 Okay, so I had a little camera trouble, yesterday. The batteries were dead, so of course I had to charge them. Well, better late than never!
These are the pedants I made using the mokume gane technique I talked about in my last post. I still need to do the sanding and buffing on them, but all in all they turned out pretty good for it to be my second attempt. Of course, I did my studying of a lot of other artist’s work and tutorials before I tried it again.
I used 3 different sizes of square clay cutters and a “rake” from a Zen garden! You can use almost anything to make your patterns in the clay. I have heard of people using magic marker caps, screwdrivers, forks, texture sheets, leather tools, almost anything and everything else!
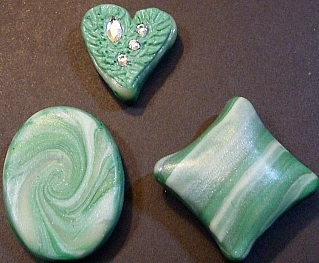
The picture below is of the pendants I made using the leftover clay from the mokume stack I made. So, even if your experimenting turns out not to be what you were hoping for, smoosh the clay up (yes, that’s a technical term) and make swirlies or run it through the pasta machine to see what kind of pattern you get from that so you can make some striped pillow beads. They are as easy as pie! Then again, you can mix the clay completely until you have another color to start over with. Good luck!
[tags]polymer clay, mokume gane, polymer clay pendants, polymer clay tutorials, show and tell[/tags]
Looking for more polymer clay texture tools? Check these out on Amazon.


looking great – how exactly do you get these squar shapes + circles to appear on your pedants????
same question. how do you get the square shapes and circles to appear on your pendants