• Home
  • Suggest A DIY
  • DIY Newsletter

Polymer Clay

Fimo and clay tips and tutorials

  • About CraftGossip
  • Our Network
    • Bath & Body Crafts
    • Candle Making Ideas
    • Crochet Ideas
    • Cross Stitch
    • Edible Crafts
    • Felting Patterns
    • Glass Art
    • Home & Garden Ideas
    • Indie Crafts
    • Jewelry Making
    • Kids Crafts
    • Knitting Patterns
    • Lesson Plans
    • Needlework
    • Party Ideas
    • Polymer Clay
    • Quilting Ideas
    • Recycled Crafts
    • Scrapbooking
    • Sewing Patterns
    • Card Making
    • DIY Weddings
    • Not Craft Ideas
  • Giveaways
  • Roundups
  • Store
  • Search

Clay Studio Series – YouTube Video Review: DIY Stoneware Plates

September 7, 2025 by Shellie Wilson

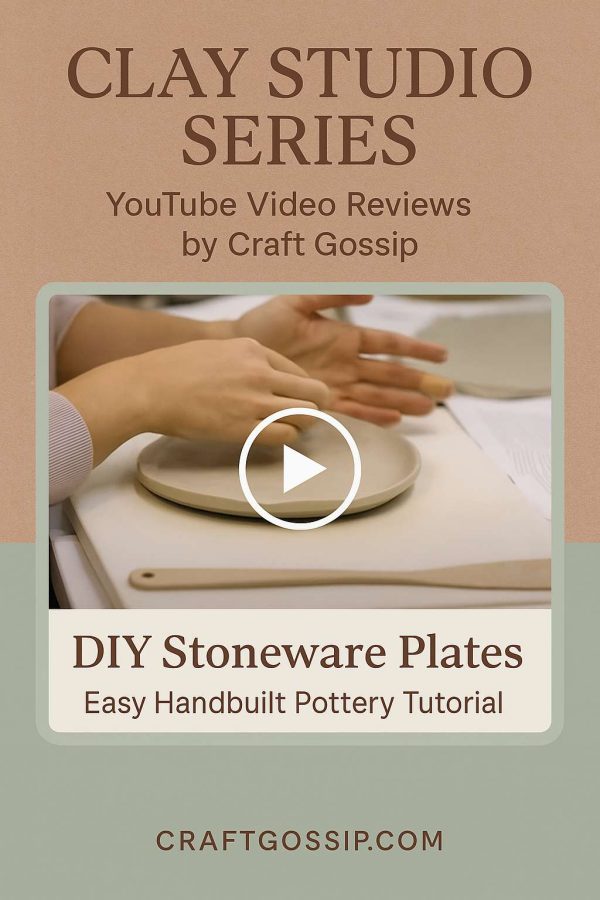
If you’ve ever dreamed of making your own dinnerware but thought you needed fancy tools or a pottery wheel, this YouTube tutorial by Jana Storm is a must-watch. In this video, Jana walks us through the process of creating handmade stoneware plates using simple methods and beginner-friendly tips.

Jana shows how to shape and form plates using stoneware clay with 25% chamotte in white. What makes this tutorial so appealing is that she proves you don’t need a wheel to create functional, food-safe ceramics. She also shares tips for pottering at home and reassures beginners that even without a full studio setup, you can still make beautiful pieces.

Why We Love It

  • Accessible: No wheel required, just basic hand-building techniques. 
  • Practical: The plates are food-safe and even dishwasher-friendly after firing. 
  • Educational: Jana explains firing at 1250°C and where to find kilns if you don’t own one (check out kilnshare.com or your local pottery studio). 
  • Inspiring: With her calm approach, she makes the art of ceramics feel doable for everyone.https://www.youtube.com/watch?v=U7BQyENjrd8 

Materials and Glazes Used

To finish the plates, Jana uses liquid glazes from BOTZ:

  • Green Granite 
  • Beige Granite 
  • Grey Basalt 

She also works with a simple pottery tool starter set, showing that you don’t need an expensive kit to get started.

Craft Gossip’s Take

This video is a perfect entry point for anyone curious about ceramics. The tutorial is well-paced, easy to follow, and practical for home hobbyists. While it does require kiln access, Jana gives great advice for finding one nearby. The finished plates are not only beautiful but also functional — making this tutorial both inspiring and useful.

If you’ve been thinking about trying your hand at DIY stoneware pottery, this is the video to start with.


Next Polymer Clay Idea:

  • How Do I Make Pottery If I Don’t Have a Kiln?
«
»

Have you read?

DIY Pottery Clay Doily Platter with Pink Speckled Glaze

There’s something special about combining old traditions with modern design. I’ve always adored the stack of vintage doilies handed down from my grandmother, but since lace doesn’t exactly suit my home aesthetic, I started experimenting with ways to repurpose their beautiful patterns in clay. That’s how I ended up creating this doily pottery platter—a simple slab of clay transformed into a textured serving dish with the help of lace, white clay, and a soft pink speckled glaze.

The result is a handmade ceramic platter that looks both timeless and contemporary, perfect for styling on a coffee table, serving treats, or simply displaying as a piece of art.

Materials You’ll Need

  • White pottery clay (stoneware or porcelain recommended)

  • Rolling pin

  • Crochet doily (cotton lace works best)

  • Sharp knife or clay cutter

  • Oval or rectangular template (a cutting board, tray, or paper template works well)

  • Sponge and water

  • Plastic wrap

  • Kiln access (or a local pottery studio firing service)

  • White glaze

  • Pink speckled glaze (or white glaze with pink oxide/pigment speckles)

Step-by-Step Tutorial

Step 1: Roll Out the Clay

Roll your clay slab to about 1/4 inch thick. Keep it even and wide enough to cut an oval platter shape.

Step 2: Press the Doily

Lay your crochet doily flat across the clay. Use the rolling pin to firmly press the pattern into the surface. Lift it carefully to reveal the intricate lace design imprinted into the clay.

Tip: Dust the doily lightly with cornstarch if it tends to stick.

Step 3: Cut the Platter Shape

Using your knife and a template, cut around the clay to form an oval platter shape. Smooth the edges with your fingers or a damp sponge.

Step 4: Lift and Shape the Platter

For a slightly raised platter, drape the clay gently over a shallow mold (like a plate or tray lined with plastic wrap). If you prefer a flat serving dish, leave it as-is on your board.

Step 5: Let It Dry

Allow the platter to dry until leather-hard. Refine the edges with a sponge, smoothing away any rough spots. Once it reaches bone dry, it’s ready for bisque firing.

Step 6: Glaze and Fire

After the first firing, apply a coat of white glaze over the entire platter. Then lightly layer on a pink speckled glaze (you can also achieve this by flicking pink oxide pigment into a clear glaze). The pink speckles add a playful, modern twist while still allowing the lace pattern to shine through. Fire again according to your glaze instructions.

Styling Your Finished Platter

This platter is both practical and beautiful. You can:

  • Use it as a serving dish for cakes, cookies, or fruit.

  • Style it on a coffee table with candles or trinkets.

  • Display it as wall art by adding a plate hanger.

  • Gift it as a keepsake—perfect for Mother’s Day, weddings, or housewarmings.

Every platter I make carries the memory of my grandmother’s doilies, but in a form that feels modern and at home with my style. The pink speckled glaze gives it a playful softness, while the lace impression keeps that touch of handmade tradition alive. It’s proof that old textiles can inspire something completely fresh when reimagined in clay.


Categories

air dry clay animals Artist Spotlight Christmas Clay Canes Clay Charms Craft Inspirations DIY Clay Tutorials and Patterns earrings Freebies halloween Inspiration necklace Plates, Bowls & Platters Polymer Clay Polymer Clay - Techniques Polymer Clay - Tutorials Polymer Clay Community Tips/Tools valentine's day

RSS More Articles

  • FIFA Soccer Crafts For Kids, Crochet Fans And Game-Day Makers
  • Cross Stitch Ice Cream and Frozen Treats
  • Sunflower Ribbon Embroidery Tutorials and Kits to Brighten Your Hoop
  • 15 Charity Sewing Projects That Let You Sew Something Useful For A Good Cause
  • Decorating Mistakes That Make Your Living Room Feel Cluttered
  • Remembering Jill Smokler, Founder Of Scary Mommy
  • In the Garden Layer Cake – A Bloom-Filled Fabric Collection for Spring Sewing
  • How To Do Kitchener Stitch: A Beginner-Friendly Guide To Grafting Knitting Seamlessly
  • Pattern Review: Georgie Granny Square Bucket Hat Crochet Pattern
  • Free Giant Squishy Octopus Crochet Pattern

Pick Your Blog

  • Sewing
  • Knitting
  • Quilting
  • Crochet
  • Home & Garden
  • Recycled Crafts
  • Scrapbooking
  • Card Making
  • Polymer Clay
  • Cross-Stitch
  • Edible Crafts
  • Felting
  • Glass Art
  • Indie Crafts
  • Kids Crafts
  • Jewelry Making
  • Lesson Plans
  • Needlework
  • Bath & Body
  • Party Ideas
  • Candle Making
  • DIY Weddings
  • Not Craft
  • Free Craft Projects

Copyright © 2026 · CraftGossip | Start Here | Contact Us | Link to Us | Your Editors | Privacy and affiliate policy