• Home
  • Suggest A DIY
  • DIY Newsletter

Polymer Clay

Fimo and clay tips and tutorials

  • About CraftGossip
  • Our Network
    • Bath & Body Crafts
    • Candle Making Ideas
    • Crochet Ideas
    • Cross Stitch
    • Edible Crafts
    • Felting Patterns
    • Glass Art
    • Home & Garden Ideas
    • Indie Crafts
    • Jewelry Making
    • Kids Crafts
    • Knitting Patterns
    • Lesson Plans
    • Needlework
    • Party Ideas
    • Polymer Clay
    • Quilting Ideas
    • Recycled Crafts
    • Scrapbooking
    • Sewing Patterns
    • Card Making
    • DIY Weddings
    • Not Craft Ideas
  • Giveaways
  • Roundups
  • Store
  • Search

Tutorial: Covering Eggs in Clay

February 29, 2016 by Elaine Robitaille

polymer_clay_easter_eggs_1

Finding out that you could cover (and bake!) plastic eggs in polymer clay was one of those happy moments. I like decorated eggs but really dislike having to blow and clean regular eggs. Of course, it means I experiment with bags of plastic ones to see which ones warp and melt the least but for the most part all they do is soften slightly while baking. I don’t even usually poke a hole in the plastic to allow for the air to expand. If you close the egg firmly and cover in a layer of scrap clay… the clay generally hardens before the air expands enough to crack the egg open. It’s not a picky and perfect approach but it means I get to cover a lot of eggs which is the fun part for me.

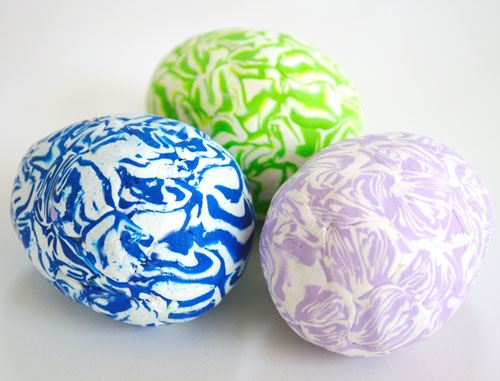
Creative in Chicago used a simple jellyroll can to cover plastic eggs. Using basic colours lets you cover the egg without worrying too much about keeping the pattern perfect. Cover a bag of plastic eggs in coordinating colours for your Easter decor. Use spiral, bullseye and marbled cane bits or, get a little brave, go with more complex designs. This is one of those projects that works well along the whole range of claying: basic, low finish on up to shiny, sanded and polished finish.

Next Polymer Clay Idea:

  • DIY Clay Egg Tray – Handmade Farmhouse Charm for…
«
»

Have you read?

How To Make A Milk Mache Molding Compound

There are some craft projects that feel like they belong on a rainy afternoon kitchen table, and this Milk Mache Molding Compound is exactly one of them. It is part craft, part science experiment, and part “wait… did we just turn milk into something solid?”

This clever little project from CraftBits shows you how to make a simple homemade molding compound using just milk and vinegar. The idea is wonderfully old-school: when the vinegar reacts with the milk, it separates into curds and liquid, leaving you with a soft mixture that can be pressed, shaped, and dried into a hard, stone-like material.

It’s a lovely one to try with kids, especially if you enjoy hands-on STEM-style crafts that do not require a trolley full of supplies. You can use the finished compound to make small charms, beads, ornaments, rustic tags, or simple molded shapes. Just keep the pieces small and thin, as this is not really the sort of compound you would use for large sculptures or anything that needs to be perfectly smooth.

What I like most about this project is how accessible it is. Most of us already have milk, vinegar, a bowl, and paper towel in the kitchen, which makes it a brilliant last-minute craft activity. It also has that slightly magical quality children love — one minute it is liquid, the next it is turning into a moldable material.

A couple of tips before you try it: use whole milk if you can, as it tends to give a better result than skim or semi-skimmed milk. White vinegar is also the best choice, as darker vinegars may affect the colour and texture. And don’t rush the draining stage. If the mixture is too wet, it will be soggy and hard to shape; if it is too dry, it may crumble.

This would be a fun companion activity for our other kids craft ideas, especially if you are looking for something simple, inexpensive, and a little bit educational. It also fits nicely with home crafts and handmade gift embellishments if you want to turn your dried shapes into tags or decorations.

Would I call this a polished, professional clay substitute? No. Would I call it a wonderfully curious, messy, memorable craft experiment? Absolutely.

If you enjoy homemade craft supplies, kitchen-table experiments, or easy projects that make children ask “how did that happen?”, this Milk Mache Molding Compound is well worth a try.

You can find the full project instructions here: Milk Mache Molding Compound

Categories

air dry clay animals Artist Spotlight Christmas Clay Canes Clay Charms Craft Inspirations DIY Clay Tutorials and Patterns earrings Freebies halloween Inspiration necklace Plates, Bowls & Platters Polymer Clay Polymer Clay - Techniques Polymer Clay - Tutorials Polymer Clay Community Tips/Tools valentine's day

RSS More Articles

  • 4 FREE Downloadable Sentiments for Dad
  • Everything You Need to Know About Embroidery Hoops
  • Printable Stickers for Journals and Planners – Self Care
  • Needle Felting Fairy Tutorial by Santa Meada
  • Stitch Your Favorite Fruit on a Sweater
  • 12 Color Wheel Inspired Scrapbook Layouts
  • Crafts With Old Bricks: Creative Ways To Upcycle Leftover Bricks
  • How To Make A Milk Mache Molding Compound
  • The 5 Outlet Placement Mistakes You Don’t Want to Make
  • Celebrate the Spirit of the Southwest with These Stunning Indian Navajo Tribal Quilt Patterns

Pick Your Blog

  • Sewing
  • Knitting
  • Quilting
  • Crochet
  • Home & Garden
  • Recycled Crafts
  • Scrapbooking
  • Card Making
  • Polymer Clay
  • Cross-Stitch
  • Edible Crafts
  • Felting
  • Glass Art
  • Indie Crafts
  • Kids Crafts
  • Jewelry Making
  • Lesson Plans
  • Needlework
  • Bath & Body
  • Party Ideas
  • Candle Making
  • DIY Weddings
  • Not Craft
  • Free Craft Projects

Copyright © 2026 · CraftGossip | Start Here | Contact Us | Link to Us | Your Editors | Privacy and affiliate policy