• Home
  • Suggest A DIY
  • DIY Newsletter

Polymer Clay

Fimo and clay tips and tutorials

  • About CraftGossip
  • Our Network
    • Bath & Body Crafts
    • Candle Making Ideas
    • Crochet Ideas
    • Cross Stitch
    • Edible Crafts
    • Felting Patterns
    • Glass Art
    • Home & Garden Ideas
    • Indie Crafts
    • Jewelry Making
    • Kids Crafts
    • Knitting Patterns
    • Lesson Plans
    • Needlework
    • Party Ideas
    • Polymer Clay
    • Quilting Ideas
    • Recycled Crafts
    • Scrapbooking
    • Sewing Patterns
    • Card Making
    • DIY Weddings
    • Not Craft Ideas
  • Giveaways
  • Roundups
  • Store
  • Search

A Crash Course in Polymer Clay

July 22, 2014 by Elaine Robitaille

pcccp_phototitle

Isabel Krueger rounded up some of the good notes and (sourced them even) and popped them into a handy polymer clay basics document.

You should have a peek and bookmark it.

Everyone always has slightly different takes on the basics and the variety out there actually helps each clayer pick their way through to what works best for them.

Check out this book on how to make polymer clay eyes and figures

Next Polymer Clay Idea:

  • How To Make An Air Dry Clay Paint Palette With…
«
»

Comments

  1. Bremda Smith says

    July 2, 2015 at 7:40 pm

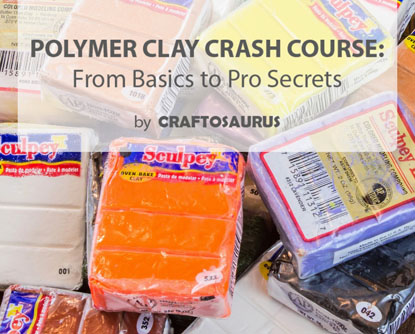
    I want to make embroidered poly pendants amd just purchased Sculpy clay. I’m a newbie and didn”t know the fifference in the clays. My question is can I mix Fimo or Kato with the Sculpy or do the ice water dunk to strengthen my clay? I don’t want to throw the Sculpy away but I don’t want my pendants to fall apart either. I need some suggestions.

  2. Elaine Robitaille says

    July 2, 2015 at 10:55 pm

    You can mix Premo and Sculpey 3 with each other for added strength. These two clays are made to bake at the same temperature and made by the same folks. Bake at the Premo time and temperature for the best strength. I do this often. Fimo and Kato have different baking temperatures so it gets a little weirder. I do bake Fimo with my Premo occasionally, anyways, and it works fine. I haven’t tried it with Kato though.

    However, unless you have those other clays on hand… if you only have Sculpey 3 right now, jump right in. Avoid making pieces that have delicate sticking out parts. Items that are solid with only low height details won’t be easily breakable. Make sure you bake for at least as long and hot as the directions and do consider going longer for added strength.

    Ice water dunking won’t strengthen your pieces. The most I’ve found it does is more quickly clarifies translucent pieces or will seal small cracks as it shocks the hot clay. The translucent will clarify the same as it cools though so that’s just an impatience thing. The best strengthener is curing properly and using the better quality clays.

  3. Queenie says

    December 21, 2020 at 9:34 am

    I’m interested in reading this document but the link doesn’t work. Can it be updated or emailed?

    Thanks!

Have you read?

How To Make A Milk Mache Molding Compound

There are some craft projects that feel like they belong on a rainy afternoon kitchen table, and this Milk Mache Molding Compound is exactly one of them. It is part craft, part science experiment, and part “wait… did we just turn milk into something solid?”

This clever little project from CraftBits shows you how to make a simple homemade molding compound using just milk and vinegar. The idea is wonderfully old-school: when the vinegar reacts with the milk, it separates into curds and liquid, leaving you with a soft mixture that can be pressed, shaped, and dried into a hard, stone-like material.

It’s a lovely one to try with kids, especially if you enjoy hands-on STEM-style crafts that do not require a trolley full of supplies. You can use the finished compound to make small charms, beads, ornaments, rustic tags, or simple molded shapes. Just keep the pieces small and thin, as this is not really the sort of compound you would use for large sculptures or anything that needs to be perfectly smooth.

What I like most about this project is how accessible it is. Most of us already have milk, vinegar, a bowl, and paper towel in the kitchen, which makes it a brilliant last-minute craft activity. It also has that slightly magical quality children love — one minute it is liquid, the next it is turning into a moldable material.

A couple of tips before you try it: use whole milk if you can, as it tends to give a better result than skim or semi-skimmed milk. White vinegar is also the best choice, as darker vinegars may affect the colour and texture. And don’t rush the draining stage. If the mixture is too wet, it will be soggy and hard to shape; if it is too dry, it may crumble.

This would be a fun companion activity for our other kids craft ideas, especially if you are looking for something simple, inexpensive, and a little bit educational. It also fits nicely with home crafts and handmade gift embellishments if you want to turn your dried shapes into tags or decorations.

Would I call this a polished, professional clay substitute? No. Would I call it a wonderfully curious, messy, memorable craft experiment? Absolutely.

If you enjoy homemade craft supplies, kitchen-table experiments, or easy projects that make children ask “how did that happen?”, this Milk Mache Molding Compound is well worth a try.

You can find the full project instructions here: Milk Mache Molding Compound

Categories

air dry clay animals Artist Spotlight Christmas Clay Canes Clay Charms Craft Inspirations DIY Clay Tutorials and Patterns earrings Freebies halloween Inspiration necklace Plates, Bowls & Platters Polymer Clay Polymer Clay - Techniques Polymer Clay - Tutorials Polymer Clay Community Tips/Tools valentine's day

RSS More Articles

  • Book Review: The Royal School of Needlework Book of Embroidery
  • Learning about Finland for Kids
  • How Craft Bloggers Can Use AI Without Losing Their Handmade Voice
  • How To Start Selling Crochet From Home Without Turning Your Hobby Into A Headache
  • Vintage Doily Jar Lanterns: A Pretty Recycled Jar Craft For Weddings, Tables & Cozy Corners
  • 4 FREE Downloadable Sentiments for Dad
  • Everything You Need to Know About Embroidery Hoops
  • Printable Stickers for Journals and Planners – Self Care
  • Needle Felting Fairy Tutorial by Santa Meada
  • Stitch Your Favorite Fruit on a Sweater

Pick Your Blog

  • Sewing
  • Knitting
  • Quilting
  • Crochet
  • Home & Garden
  • Recycled Crafts
  • Scrapbooking
  • Card Making
  • Polymer Clay
  • Cross-Stitch
  • Edible Crafts
  • Felting
  • Glass Art
  • Indie Crafts
  • Kids Crafts
  • Jewelry Making
  • Lesson Plans
  • Needlework
  • Bath & Body
  • Party Ideas
  • Candle Making
  • DIY Weddings
  • Not Craft
  • Free Craft Projects

Copyright © 2026 · CraftGossip | Start Here | Contact Us | Link to Us | Your Editors | Privacy and affiliate policy