• Home
  • Suggest A Craft
  • DIY Newsletter

Polymer Clay

Fimo and clay tips and tutorials

  • About CraftGossip
  • Our Network
    • Bath & Body Crafts
    • Candle Making Ideas
    • Crochet Ideas
    • Cross Stitch
    • Edible Crafts
    • Felting Patterns
    • Glass Art
    • Home & Garden Ideas
    • Indie Crafts
    • Jewelry Making
    • Kids Crafts
    • Knitting Patterns
    • Lesson Plans
    • Needlework
    • Party Ideas
    • Polymer Clay
    • Quilting Ideas
    • Recycled Crafts
    • Scrapbooking
    • Sewing Patterns
    • Card Making
    • DIY Weddings
    • Not Craft Ideas
  • Giveaways
  • Roundups
  • Store
  • Search

DIY: Sunset Blends in Clay

September 27, 2015 by Elaine Robitaille

sunset-blend

In polymer clay clay, mixing colours can be a bit of an art. The manufacturers offer their picks which change on a fairly random basis. Artists get to mix and mix again to meet whatever needs they have. Need a perfect periwinkle? Try mixes of Premo Turquoise and Fuschia. Too much of the Fuschia and you get more of a lavender. It’s still lovely though.

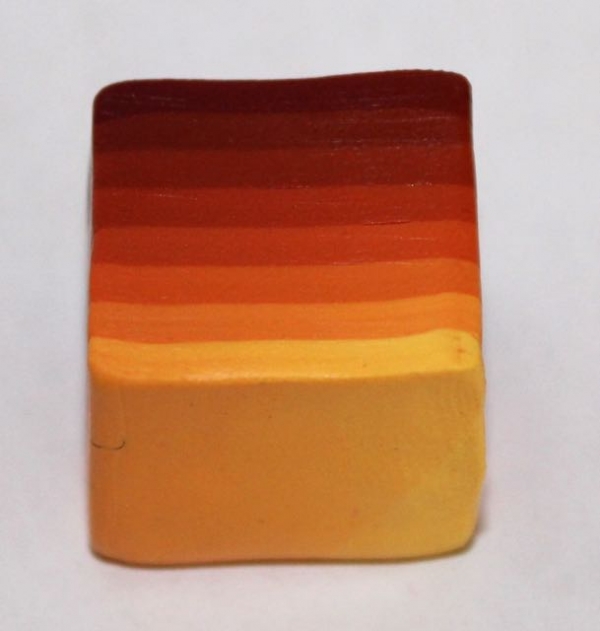
Mixing the colours for blends can be even more interesting since you’re planning for a whole colour range then. I’m fairly boring and work, mostly with dark to light blends, primarily with white, ecru or grey on the light end and out of the package colours on the dark end. Meg Newberg does some fancy colour work to get the pretty sunset shaded blend above. She offers a quick picture step through and a print out for the Skinner layout. Her Etsy shop contains further tutorials that use this blend or ones like it. By itself, this blend would be fabulous for backgrounds of pieces. Use a silhouette design on top of this to make a great tropical or landscape scene for pendants.

Next Polymer Clay Idea:

  • DIY Metal Clay: How to Make Your Own Silver and…
«
»

Have you read?

Pottery Clay – DIY Divided Tapas Serving Platter with Illustrated Sections

Every good hostess knows a serving platter is the secret weapon at a party. It corrals snacks, makes everything look intentional, and saves you from running back and forth with little bowls. This DIY divided platter takes that idea one step further: each section is labeled with hand-drawn illustrations, making it both useful and irresistibly charming.

The original inspiration came from these  tapas-style platters, but we’re creating an English version featuring everyday snacks and nibbles. It’s fun, it’s functional, and it makes even store-bought crackers look Pinterest-worthy.

Materials You’ll Need

  • White ceramic clay (or air-dry clay if you don’t have access to a kiln) 
  • Rolling pin or slab roller 
  • Oval platter base template (downloadable below) 
  • Divider templates (downloadable below) 
  • Scoring tool + slip for joining clay 
  • Sponge and rib tool for smoothing 
  • Cobalt blue underglaze pencil OR blue underglaze with a fine brush 
  • Kiln + clear glaze (for ceramic clay) OR a food-safe sealant (for air-dry clay) 

Step-by-Step Tutorial

Step 1: Shape the Base

Roll a slab of clay about ½ inch thick. Place the oval platter template on top and cut out your base. Smooth edges with a damp sponge.

Step 2: Add Dividers

Use the divider templates to cut strips of clay. Attach them to the base by scoring and slipping. Smooth joins and curve the edges slightly for a handmade look.

Step 3: Refine

Let the platter dry until it’s leather-hard. At this stage, you can tidy the walls, soften corners, and make sure the surface is smooth.

Step 4: Draw Your Illustrations

Here’s where the personality shines. Using an underglaze pencil or fine brush, sketch quick doodles into each section. Keep them loose and playful, not perfect. Our platter has:

  • Cheese – wedges with holey details 
  • Ham – loose stack of wavy slices 
  • Anchovies – three slim fish outlines 
  • Sardines – larger, striped fish drawings 
  • Salami – one log plus a few round slices with dotted speckles 
  • Olives – oval shapes with pits, some sliced open 
  • Tomatoes – little cluster of round tomatoes tied together 

Note: Drawings are slightly altered from the original for a fresh, unique design.

Step 5: Fire and Finish

  • For ceramic clay: bisque fire, add clear glaze, and glaze fire. 
  • For air-dry clay: allow to dry fully, then paint with a clear food-safe sealant if you’ll use it for food. Otherwise, it makes a perfect decorative tray. 


RSS More Articles

  • You’ll Go Batty Over These 40 Bat-Themed Sewing Patterns for Halloween!
  • DIY Paper Bag Mushrooms – A Creative Upcycled Craft for Kids and Nature Lovers
  • Book Review – Stitched Photo Mosaic Quilting
  • Free Crochet Pattern – Halloween Skull Sweater
  • 5 FREE Cute, Comfy and Cozy Fall Coloring Pages
  • Meet Mr. Boo – The Ultimate Halloween Decoration That Will Steal the Show
  • Book Review: Cross Stitch Alphabet and Number Patterns
  • Knit a Jacket Inspired by an Iconic Coco Chanel Look
  • Learning about Côte D’ivoire for Kids
  • 12 Autumn Botanical Scrapbook Layout Ideas

Pick Your Blog

  • Sewing
  • Knitting
  • Quilting
  • Crochet
  • Home & Garden
  • Recycled Crafts
  • Scrapbooking
  • Card Making
  • Polymer Clay
  • Cross-Stitch
  • Edible Crafts
  • Felting
  • Glass Art
  • Indie Crafts
  • Kids Crafts
  • Jewelry Making
  • Lesson Plans
  • Needlework
  • Bath & Body
  • Party Ideas
  • Candle Making
  • DIY Weddings
  • Not Craft
  • Free Craft Projects

Copyright © 2025 · CraftGossip | Start Here | Contact Us | Link to Us | Your Editors | Privacy and affiliate policy