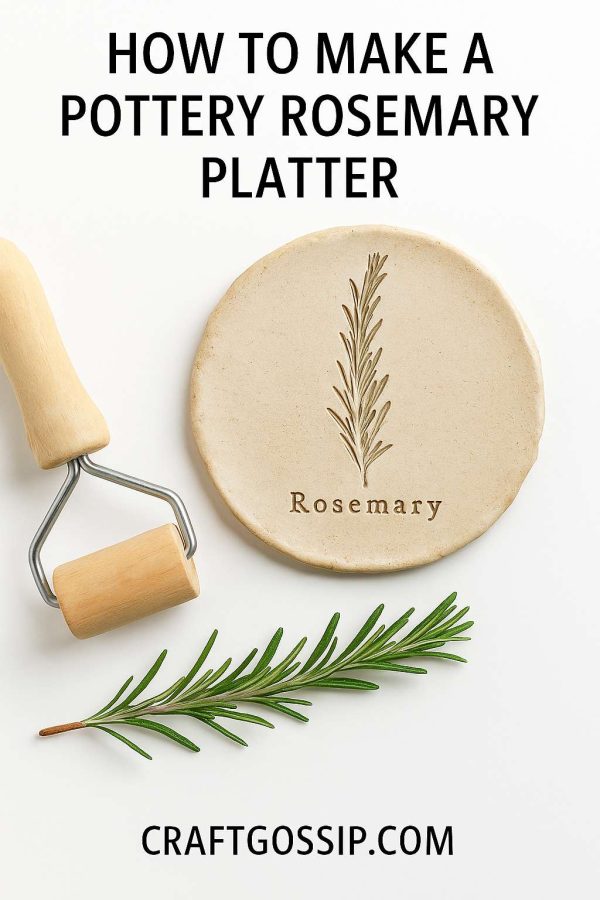
There’s something so timeless about combining clay with nature. Pressing herbs into pottery creates a simple yet striking effect—rustic, organic, and perfectly imperfect. Today we’re making a rosemary platter using real sprigs of rosemary pressed into clay. You can make this project with pottery clay that you fire in a kiln, or keep it simple with air-dry clay (variation at the end).
This platter makes a beautiful gift for gardeners, cooks, or anyone who loves that handmade touch.
Materials You’ll Need
- Clay slab (pottery clay or air-dry clay)
- Fresh rosemary sprig (washed and dried)
- Rolling pin or clay roller
- Knife or clay cutter
- Wooden board or canvas cloth (to roll clay on)
- Bowl of water & sponge (for smoothing edges)
- Alphabet stamps (optional, for lettering)
- Underglaze or black acrylic paint (for highlighting imprint, optional)
- Clear glaze (for kiln clay) or sealant (for air-dry clay)
Instructions
Step 1: Roll Out the Clay
- Start by rolling your clay into a slab, about 1 cm thick.
- Place it on a flat surface covered with canvas or burlap to stop it sticking.
- Shape it into an oval, rectangle, or whatever platter shape you prefer.
Step 2: Press the Rosemary
- Place your rosemary sprig flat on the clay.
- Use the rolling pin to gently but firmly press it into the surface.
- Carefully peel the rosemary away—you’ll see a beautiful botanical imprint left behind.
Step 3: Shape the Platter
- Smooth the edges with your fingers dipped in water.
- If you want a raised rim, gently pinch or lift the edges of the slab.
- Use a knife or clay cutter to tidy the outline into a neat platter shape.
Step 4: Add Lettering (Optional)
- For an extra personal touch, stamp the word Rosemary (or any herb you like) into the clay.
- You can use alphabet stamps or carve freehand with a stylus.
Step 5: Drying & Firing
If using pottery clay:
- Allow the piece to dry slowly until bone dry.
- Fire in a kiln according to your clay’s temperature.
- Once bisque-fired, you can brush a little underglaze or dark wash into the imprint, wipe the excess, and glaze clear before firing again.
If using air-dry clay:
- Let the platter air dry for 24–48 hours, flipping halfway through to avoid warping.
- Once dry, paint the imprint with acrylic paint if desired.
- Seal with a waterproof varnish if you plan to wipe it clean.
Air-Dry Clay Variation
If you don’t have access to a kiln, air-dry clay is a wonderful alternative. The process is exactly the same—just be sure to seal the finished platter if you’ll be handling it often. Keep in mind air-dry platters are decorative only and not food-safe. They look gorgeous as catch-all trays, jewelry dishes, or rustic decor pieces.
This project is as much about the process as the final piece. There’s something grounding about rolling herbs into clay—like bottling up a little piece of your garden forever.


