Festive Entertaining Idea for Holiday Charcuterie Boards
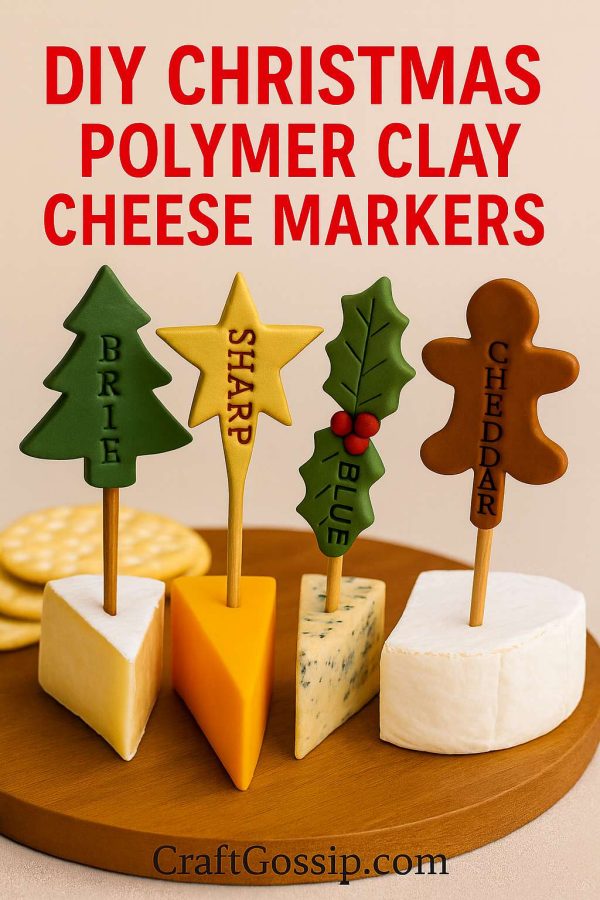
If you’re planning a holiday party, you already know the cheese board is where everyone gathers. This year, add a handmade, festive touch with DIY polymer clay cheese markers in Christmas shapes and colors. These adorable little markers are both practical and decorative — helping guests identify cheeses while doubling as holiday table décor.
The best part? They’re easy to make, completely customizable, and way less expensive than buying fancy sets at home décor stores. Think Anthropologie vibes, but on a DIY budget!
Why Polymer Clay is Perfect for Cheese Markers
While air-dry clay can work, polymer clay has the upper hand for entertaining:
- Durable & Reusable: Once baked, polymer clay is sturdy and can be wiped clean after use.
- Custom Colors: Blend classic holiday shades — think holly green, candy-cane red, snowy white, and shimmering gold.
- Professional Finish: With a little stamping and shaping, you get that Anthropologie-style look at a fraction of the cost.
Supplies You’ll Need
- Polymer clay in red, green, white, and gold (holiday colors)
- Christmas-themed clay cutters (tree, star, gingerbread man, ornament, holly leaves, snowflake)
- Clay roller or acrylic rolling pin
- Alphabet stamp set (for stamping cheese names)
- Skewers, toothpicks, or thin metal picks
- Craft knife or clay blade
- Baking sheet lined with parchment paper
- Oven (follow clay brand instructions, usually 265–275°F)
- Metallic mica powder or gold paint (optional for accents)
- Clear gloss varnish (optional for shine)
Step-by-Step Instructions
1. Condition the Clay
Knead the polymer clay until soft and pliable. This ensures it won’t crack when baked.
2. Roll It Out
Roll the clay flat, about 1/8” thick. Keep it even so the markers look polished and professional.
3. Cut the Shapes
Use holiday-themed cutters to create your markers — Christmas trees, stars, holly, or gingerbread men are all fun options.
4. Add Details
Stamp in cheese names like “Brie,” “Sharp,” or “Blue” with your alphabet stamps. If you prefer, you can stamp festive words instead (like “Joy,” “Merry,” or “Noel”).
5. Insert the Picks
Press the end of your skewer or cheese pick into the base of each shape. Smooth clay around the base to secure.
6. Bake the Clay
Place your markers on parchment paper and bake according to package directions (usually 15–30 minutes). Let cool completely.
7. Add Festive Finishing Touches
Brush gold mica powder on the edges for sparkle, or add tiny painted accents to highlight details. Seal with a gloss varnish if you want shine.
Styling Your Holiday Cheese Board
Once your markers are finished, insert them into wedges of cheese and arrange with holiday garnishes like cranberries, rosemary sprigs, and sugared nuts. The Christmas colors and shapes instantly elevate your board into a centerpiece.
Tips & Variations
- Mini Gifts: Wrap a set of 4–6 markers and gift them as hostess presents.
- Name Tags: Stamp guest names instead of cheese names for a dual-purpose place card.
- Themed Sets: Make a star set, tree set, or gingerbread set for consistency.
These DIY Christmas polymer clay cheese markers are the perfect blend of festive and functional. They’ll save you money, add a personal handmade touch, and bring extra holiday cheer to your entertaining table. Plus, they’ll last for years to come — just tuck them away with your Christmas décor after the season.
Your guests will love the thoughtful detail, and you’ll love how easy they are to make.