• Home
  • Suggest A DIY
  • DIY Newsletter

Polymer Clay

Fimo and clay tips and tutorials

  • About CraftGossip
  • Our Network
    • Bath & Body Crafts
    • Candle Making Ideas
    • Crochet Ideas
    • Cross Stitch
    • Edible Crafts
    • Felting Patterns
    • Glass Art
    • Home & Garden Ideas
    • Indie Crafts
    • Jewelry Making
    • Kids Crafts
    • Knitting Patterns
    • Lesson Plans
    • Needlework
    • Party Ideas
    • Polymer Clay
    • Quilting Ideas
    • Recycled Crafts
    • Scrapbooking
    • Sewing Patterns
    • Card Making
    • DIY Weddings
    • Not Craft Ideas
  • Giveaways
  • Roundups
  • Store
  • Search

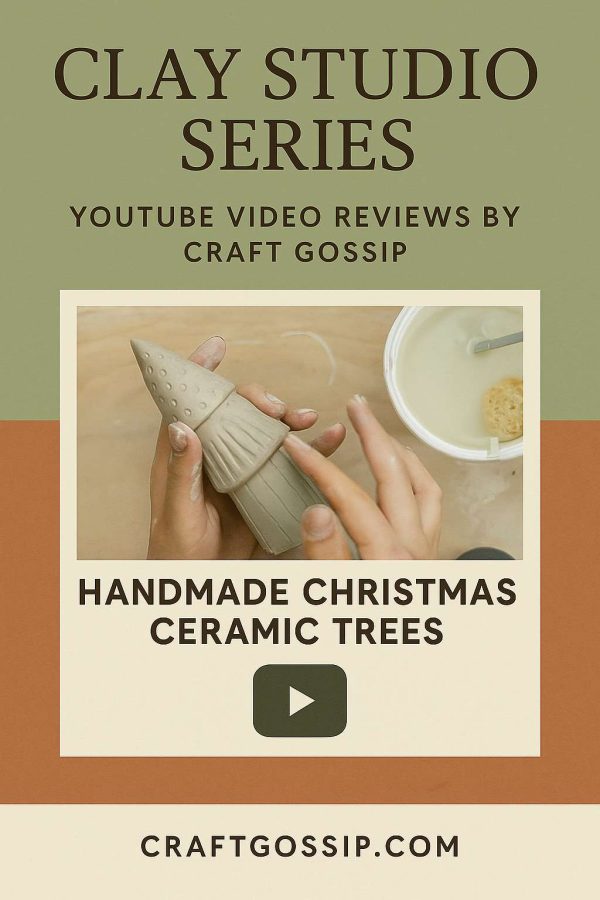
Clay Studio Series – YouTube Video Review Handbuilt Ceramic Christmas Trees

November 16, 2025 by Shellie Wilson

The holidays are the perfect time to bring handmade charm into your home, and this video from AMACO shows exactly how. In this tutorial, you’ll learn how to create handbuilt ceramic trees using simple techniques that even beginners can follow. Whether you’re looking for festive décor, a fun studio project, or unique handmade gifts, these trees make a perfect seasonal craft.

The Video

This step-by-step demonstration highlights how to shape, assemble, and decorate clay into tall tree forms. Using AMACO’s A-Mix White Stoneware No. 11 and their Celadon glazes, the instructor walks you through each stage of building. With clear close-ups, you’ll see exactly how the textures are applied and how to give your trees personality.

The tutorial is practical, well-paced, and filmed in a way that makes it easy to follow along from your own studio or kitchen table.

What We Loved

  • Beginner-Friendly Approach – The steps are simple enough that even first-time handbuilders can achieve great results. 
  • Festive Project Idea – Perfect for Christmas holidays or winter décor. These trees can stand alone or be displayed as a set. 
  • Glaze Inspiration – The video doubles as a showcase for AMACO Celadon glazes, offering color and finish ideas you can experiment with. 
  • Versatility – While trees are the focus, the same building techniques could be adapted for other seasonal shapes.https://www.youtube.com/watch?v=yf3-Zi7d0jI 

Key Takeaways

  1. Handbuilding doesn’t require fancy tools — just clay, slip, and a few simple implements. 
  2. Textures can transform a plain cone into something magical. 
  3. Glazing is where you can personalize the project, whether with classic greens or experimental hues. 
  4. These trees make excellent holiday gifts that feel personal and meaningful. 

Why You Should Watch

If you’re looking for a holiday project that’s easy, festive, and achievable, this video is a must-watch. It captures the fun of seasonal clay crafting and offers practical guidance for potters of all skill levels.

 Watch the full video here: Handbuilt Ceramic Christmas Trees

 

«
»

Have you read?

DIY Doily Pinch Bowl Set with Matching Platter

There’s something so satisfying about creating a whole handmade set that feels like it belongs together. After experimenting with my grandmother’s doilies on flat slabs of clay, I wanted to see how they would look when pressed onto a curved form. That’s how this set of three doily pinch bowls was born—each one textured on the outside with lace, glazed in soft tones, and displayed together on a matching pink speckled doily platter.

It’s a beautiful way to combine sentimental textiles with modern pottery design. The finished set makes a charming serving arrangement for nibbles, dips, or trinkets, and it doubles as a decorative centerpiece when not in use.

Materials You’ll Need

  • White pottery clay (stoneware or porcelain) 
  • Rolling pin 
  • Crochet doily (preferably a smaller one for consistent texture) 
  • Sponge and water 
  • Small bowls or your hands (to form the pinch bowls) 
  • Knife or clay cutter 
  • Plastic wrap 
  • Kiln access (or community pottery studio) 
  • White glaze 
  • Pink speckled glaze (or white glaze with pink oxide) 

Step-by-Step Tutorial

Step 1: Prepare the Clay

Cut your clay into three equal pieces. Roll each piece into a ball about the size of a small orange.

Step 2: Form the Pinch Bowls

Using your thumbs, gently press into the center of each clay ball and pinch outward, rotating as you go, until you form small bowl shapes. Keep the walls fairly even, but don’t worry about perfection—pinch bowls are meant to have a rustic, organic charm.

Step 3: Press the Doily Texture

Drape a crochet doily around the outside of each bowl. Gently press it into the surface with your fingers or a rolling pin. Carefully peel it back to reveal the lace impression. Each bowl will carry the delicate detail of the doily, almost like a frozen textile pattern.

Step 4: Refine the Shape

Smooth the rims with a damp sponge, rounding off any sharp edges. Leave the outside textured, but clean up the insides of the bowls so they’re smooth for glazing.

Step 5: Dry and Fire

Let the bowls dry slowly until bone dry. Bisque fire them with the platter if you’re making the full set together.

Step 6: Glaze and Finish

For a cohesive look, glaze the pinch bowls in soft white or cream, allowing the doily texture to stand out. Place them on the matching pink speckled doily platter (created using the earlier technique) for a complete serving set.

Styling Ideas

  • Serving Set: Use the three bowls for nuts, olives, and dips when entertaining. 
  • Jewelry Dishes: Perfect for holding rings, bracelets, and earrings on your dresser. 
  • Decorative Accent: Place them on the platter as a centerpiece with seasonal décor inside (dried flowers, crystals, or potpourri). 
  • Gift Idea: Wrap the full set as a handmade, one-of-a-kind present for weddings or housewarmings. 

Why I Love This Project

These bowls carry a story. The lace impressions remind me of my grandmother’s hand-crocheted doilies, yet the final design feels fresh and modern. Displayed together on the platter, they become more than functional—they’re a handmade heirloom set that blends memory with everyday beauty.


Categories

air dry clay animals Artist Spotlight Christmas Clay Canes Clay Charms Craft Inspirations DIY Clay Tutorials and Patterns earrings Freebies halloween Inspiration necklace Plates, Bowls & Platters Polymer Clay Polymer Clay - Techniques Polymer Clay - Tutorials Polymer Clay Community Tips/Tools valentine's day

RSS More Articles

  • How to Make a Junk Journal from Start to Finish (Beginner-Friendly Guide)
  • Math Centers to Help Kids Learn
  • How to Color on Kraft Cardstock with Alcohol Markers for a Halloween Card
  • Cricut Maker 5 First Look: What’s New and Is It Worth the Upgrade?
  • Designer Spotlight: Works by ABC
  • DMC Pomegranates Intermediate Embroidery Kit Review
  • 15 Unique And Snarky Embroidered Patches To Sew Onto Your Clothes
  • How to Make a Back to School Shaker Scrapbook Layout
  • Knit Back at AI Patterns with the AIlephant
  • 10 Ice Cubes That Instantly Elevate Prosecco

Pick Your Blog

  • Sewing
  • Knitting
  • Quilting
  • Crochet
  • Home & Garden
  • Recycled Crafts
  • Scrapbooking
  • Card Making
  • Polymer Clay
  • Cross-Stitch
  • Edible Crafts
  • Felting
  • Glass Art
  • Indie Crafts
  • Kids Crafts
  • Jewelry Making
  • Lesson Plans
  • Needlework
  • Bath & Body
  • Party Ideas
  • Candle Making
  • DIY Weddings
  • Not Craft
  • Free Craft Projects

Copyright © 2026 · CraftGossip | Start Here | Contact Us | Link to Us | Your Editors | Privacy and affiliate policy