• Home
  • Suggest A DIY
  • DIY Newsletter

Polymer Clay

Fimo and clay tips and tutorials

  • About CraftGossip
  • Our Network
    • Bath & Body Crafts
    • Candle Making Ideas
    • Crochet Ideas
    • Cross Stitch
    • Edible Crafts
    • Felting Patterns
    • Glass Art
    • Home & Garden Ideas
    • Indie Crafts
    • Jewelry Making
    • Kids Crafts
    • Knitting Patterns
    • Lesson Plans
    • Needlework
    • Party Ideas
    • Polymer Clay
    • Quilting Ideas
    • Recycled Crafts
    • Scrapbooking
    • Sewing Patterns
    • Card Making
    • DIY Weddings
    • Not Craft Ideas
  • Giveaways
  • Roundups
  • Store
  • Search

Tutorial: Making Polymer Clay Eyes

August 15, 2012 by Elaine Robitaille

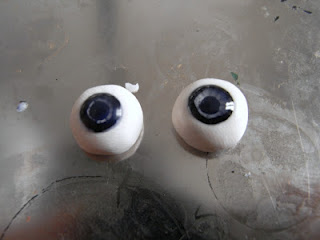
Here’s a fairly simple but nicely realistic tutorial for making clay eyes. These eyes can be added to figurines and other characters. Pop some clay eyes on anything and it suddenly comes alive.  These clay eyes are realistic and full of depth.

I figure a bunch of these would be fabulous for some Halloween foolery. Heck, who am I kidding, they’d be lovely to use for pranks here…

Picture credit to Saraccino

Check out this book on how to make polymer clay eyes and figures
«
»

Comments

  1. Gloria McKinney says

    August 16, 2012 at 10:13 am

    http://www.lauramccabeart.com/SearchResults.asp?Cat=1819

    Thought you might want to see how Laura Mccabe uses eyes.

    Always wanted to incorporate them into a piece. Thank you SO VERY much for your tutorial!!

  2. Gloria McKinney says

    August 16, 2012 at 10:15 am

    Thank you very much for sharing

  3. saraccino says

    October 22, 2012 at 12:53 pm

    I have more eyeballs made (also with image transfer) to show on my blog… and some to share 🙂

    http://saraccino.blogspot.de/2012/10/on-my-worktable-and-some-tiny-eyeballs.html

Have you read?

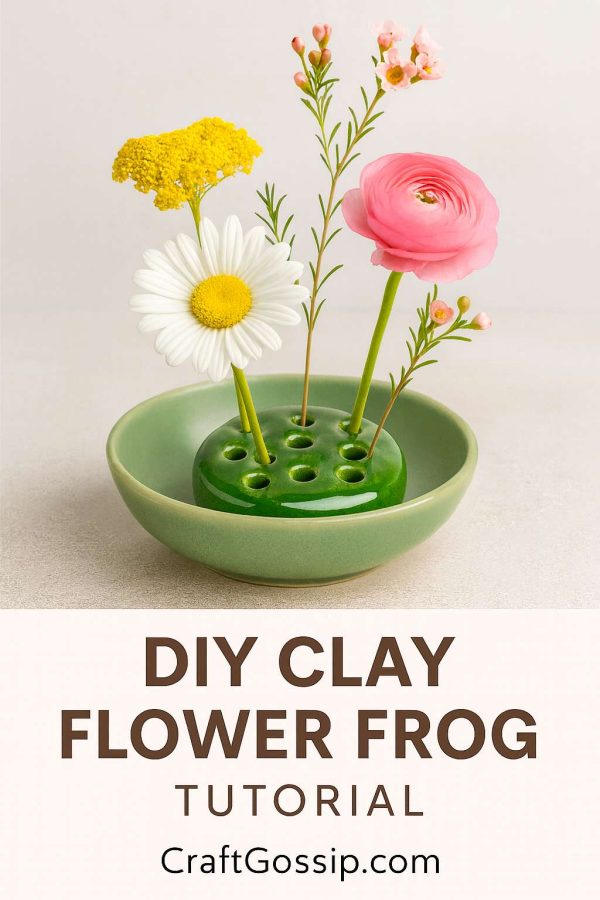
DIY Clay Flower Frog Tutorial – A Handmade Tool for Arranging Blooms

If you’ve ever struggled to get your flowers to stand just right in a vase, let me introduce you to one of the most charming old-fashioned tools around: the flower frog. Traditionally made from metal or glass, a flower frog is simply a base with holes that keeps stems in place so you can create balanced, natural arrangements without fussing. Today, we’re giving this vintage idea a modern twist by making a clay flower frog with our own hands.

This project is wonderfully simple, yet it creates something you’ll use again and again – especially if you love bringing fresh blooms inside from the garden. It’s also a fantastic beginner-friendly clay project that gives you a chance to practice shaping and smoothing without needing advanced pottery skills.

Materials You’ll Need

  • Pottery clay (stoneware or earthenware works well; you can also use air-dry clay for a decorative-only version)

  • A rolling pin or clay roller

  • A needle tool or skewer

  • A small round cookie cutter or cup for shaping

  • Sponge and water for smoothing

  • Optional: glaze in your favorite color (if kiln-firing) or acrylic paint/sealer for air-dry clay

Step-by-Step Tutorial

Step 1: Prepare Your Clay

Wedge your clay (fancy potter’s word for kneading out the air bubbles) until smooth. Roll it out to about 1 inch thick – thick enough that your holes won’t weaken the structure.

Step 2: Cut the Base Shape

Using a cookie cutter, cup, or template, cut out a circle or oval about 3–4 inches across. This will form the base of your flower frog. Smooth the edges with a damp sponge.

Step 3: Add the Holes

Use a skewer, chopstick, or needle tool to pierce holes across the surface. Space them evenly but not too close to the edges. Aim for around 6–10 holes, depending on the size of your frog. Make sure the holes go all the way through so stems can slide in easily.

Step 4: Refine and Smooth

Dip your tool in water and smooth around each hole to prevent cracking later. Take your time here—neat holes are what make your frog functional and pretty.

Step 5: Let It Dry

  • For kiln clay: Allow to dry until bone dry, then bisque fire. Apply glaze of choice and fire again.

  • For air-dry clay: Let it cure completely according to the package instructions, usually 24–48 hours.

Step 6: Finish and Seal

  • If you’re kiln-firing, this is where you’ll add that glossy glaze – think celadon green, soft blue, or speckled neutrals.

  • If you’re using air-dry clay, paint with acrylics and add a clear sealer to protect it from water.

Using Your Clay Flower Frog

Place your finished frog at the bottom of a shallow bowl or vase, add water, and start threading flower stems through the holes. The frog will hold them upright and let you create that lush, organic look without fuss. For a more rustic style, leave the clay unglazed (just make sure it’s still sealed if you’ll be adding water).

Variations to Try

  • Mini Frogs: Make smaller versions for teacups or bud vases.

  • Square or Oval Shapes: Who says flower frogs have to be round?

  • Decorative Impressions: Press lace, leaves, or stamps into the clay before making the holes for a bit of texture.

  • Stacked Frogs: Make two thinner discs and stack them together for a taller look.

Why You’ll Love This Project

Not only do you get a handmade, functional tool, but you’re also keeping alive a vintage floral tradition. These little clay flower frogs make beautiful gifts, especially paired with a thrifted vase and a bunch of fresh-picked blooms.


Categories

air dry clay animals Artist Spotlight Christmas Clay Canes Clay Charms Craft Inspirations DIY Clay Tutorials and Patterns earrings Freebies halloween Inspiration necklace Plates, Bowls & Platters Polymer Clay Polymer Clay - Techniques Polymer Clay - Tutorials Polymer Clay Community Tips/Tools valentine's day

RSS feed: More Articles More Articles

  • Fun Halloween Worksheets for Kids
  • How to Start Junk Journaling with Items You Already Have
  • Free Printable Witch Hat Bag Toppers for Doritos
  • Granny Square Along by Lori Holt: A Crochet Book for Lovers of Vintage Colour
  • 10 DIY Scary Halloween Decorations for a Seriously Spooky Home
  • Pumpkin Man Doughnut Treats With a Free Halloween Printable
  • How to Make a Double Interactive Cauldron Card for Halloween
  • Book Review: Stitch Alphabets & Numbers
  • Knit a Leopard Print Shawl and Learn about Yarn Substitution
  • DIY Mini Cotton Bag Ghosts: Easy No-Sew Halloween Decorations

Pick Your Blog

  • Sewing
  • Knitting
  • Quilting
  • Crochet
  • Home & Garden
  • Recycled Crafts
  • Scrapbooking
  • Card Making
  • Polymer Clay
  • Cross-Stitch
  • Edible Crafts
  • Felting
  • Glass Art
  • Indie Crafts
  • Kids Crafts
  • Jewelry Making
  • Lesson Plans
  • Needlework
  • Bath & Body
  • Party Ideas
  • Candle Making
  • DIY Weddings
  • Not Craft
  • Free Craft Projects

Copyright © 2026 · CraftGossip | Start Here | Contact Us | Link to Us | Your Editors | Privacy and affiliate policy