 I’ll be updating my blog roll and would love your help! Am I missing your favorite polymer clay blog? Do you have a blog that explores your polymer clay adventures? Am I missing one of the great ones that have recently popped up? Leave a link in the comments section so I can be sure to include them when I make my updates this weekend.
Comments
Have you read?
DIY Clay Flower Frog Tutorial – A Handmade Tool for Arranging Blooms
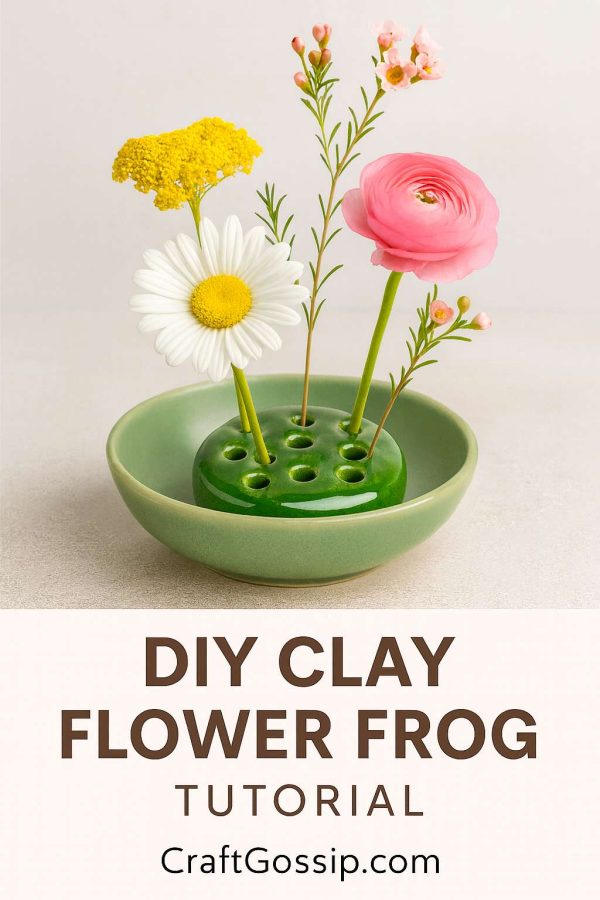
If you’ve ever struggled to get your flowers to stand just right in a vase, let me introduce you to one of the most charming old-fashioned tools around: the flower frog. Traditionally made from metal or glass, a flower frog is simply a base with holes that keeps stems in place so you can create balanced, natural arrangements without fussing. Today, we’re giving this vintage idea a modern twist by making a clay flower frog with our own hands.
This project is wonderfully simple, yet it creates something you’ll use again and again – especially if you love bringing fresh blooms inside from the garden. It’s also a fantastic beginner-friendly clay project that gives you a chance to practice shaping and smoothing without needing advanced pottery skills.
Materials You’ll Need
- Pottery clay (stoneware or earthenware works well; you can also use air-dry clay for a decorative-only version)
- A rolling pin or clay roller
- A needle tool or skewer
- A small round cookie cutter or cup for shaping
- Sponge and water for smoothing
- Optional: glaze in your favorite color (if kiln-firing) or acrylic paint/sealer for air-dry clay
Step-by-Step Tutorial
Step 1: Prepare Your Clay
Wedge your clay (fancy potter’s word for kneading out the air bubbles) until smooth. Roll it out to about 1 inch thick – thick enough that your holes won’t weaken the structure.
Step 2: Cut the Base Shape
Using a cookie cutter, cup, or template, cut out a circle or oval about 3–4 inches across. This will form the base of your flower frog. Smooth the edges with a damp sponge.
Step 3: Add the Holes
Use a skewer, chopstick, or needle tool to pierce holes across the surface. Space them evenly but not too close to the edges. Aim for around 6–10 holes, depending on the size of your frog. Make sure the holes go all the way through so stems can slide in easily.
Step 4: Refine and Smooth
Dip your tool in water and smooth around each hole to prevent cracking later. Take your time here—neat holes are what make your frog functional and pretty.
Step 5: Let It Dry
- For kiln clay: Allow to dry until bone dry, then bisque fire. Apply glaze of choice and fire again.
- For air-dry clay: Let it cure completely according to the package instructions, usually 24–48 hours.
Step 6: Finish and Seal
- If you’re kiln-firing, this is where you’ll add that glossy glaze – think celadon green, soft blue, or speckled neutrals.
- If you’re using air-dry clay, paint with acrylics and add a clear sealer to protect it from water.
Using Your Clay Flower Frog
Place your finished frog at the bottom of a shallow bowl or vase, add water, and start threading flower stems through the holes. The frog will hold them upright and let you create that lush, organic look without fuss. For a more rustic style, leave the clay unglazed (just make sure it’s still sealed if you’ll be adding water).
Variations to Try
- Mini Frogs: Make smaller versions for teacups or bud vases.
- Square or Oval Shapes: Who says flower frogs have to be round?
- Decorative Impressions: Press lace, leaves, or stamps into the clay before making the holes for a bit of texture.
- Stacked Frogs: Make two thinner discs and stack them together for a taller look.
Why You’ll Love This Project
Not only do you get a handmade, functional tool, but you’re also keeping alive a vintage floral tradition. These little clay flower frogs make beautiful gifts, especially paired with a thrifted vase and a bunch of fresh-picked blooms.
Hi Heather,
My blog, Artventuring, explores my work in mixed media, including polymer clay. I’m a proud member of PCAGOE, and a regular reader of many of your blogroll blogs. I’d be honored to be included among them.
Thanks,
Michelle
Hi Heather,
Here’s my blog. I’m a polymer clay artist in Canada and founder of the Vancouver Polymer Clay Guild. My next project is building a new house so my blog is about both claying & house-building. “Demo” has a different meaning for me right now as we’re in the process of watching our old house being demolished this week.
Hope you have time to check in.
Jem
Hi Heather. Would love to be added to your blog roll.
http://www.stormydesigns.biz/blog
Hi Heather. I have a podcast where i interview all types of artists. Some of the past polymer artists are: Donna Kato, Elise Winters, and Gwen Gibson to name a few. Coming up in the next few months I will be talking to some other well know names. Thanks and love your blog.
Alison
Hi Heather, I have a polymer clay blog — in fact, I just linked to a shell cane tutorial of yours last week. I’d love to be added to your blogroll.
Hi Heather…I have a blog and a picturealbum. I actually have you in my link 🙂 I’d love to be added.
Tina
I have a blog (and a site that is in dire need of updating)
Molymerclay.blogspot.com
thanks
Hi Heather…I also have a blog on polymer clay bead making tutorials which I would love if you added to the list.
Here is a link to a recent post:
http://www.beadsandbeading.com/blog/luna-lovegood-radish-earrings-love-hate/28/
Cindy