
I’ve been a fan of Noadi’s Art for a while now. Octopus, squid, and cuttlefish jewelry! What’s not to like? I was tickled by these Octopus hair clips she created for a custom order that I noticed on her Flickr photostream. You can check out her etsy shop here.
[tags]Noadi’s art, octopus, hair clips, polymer clay[/tags]
Comments
Have you read?
DIY Leaf Imprint Pottery Soap Dish – Green Glazed Botanical Design
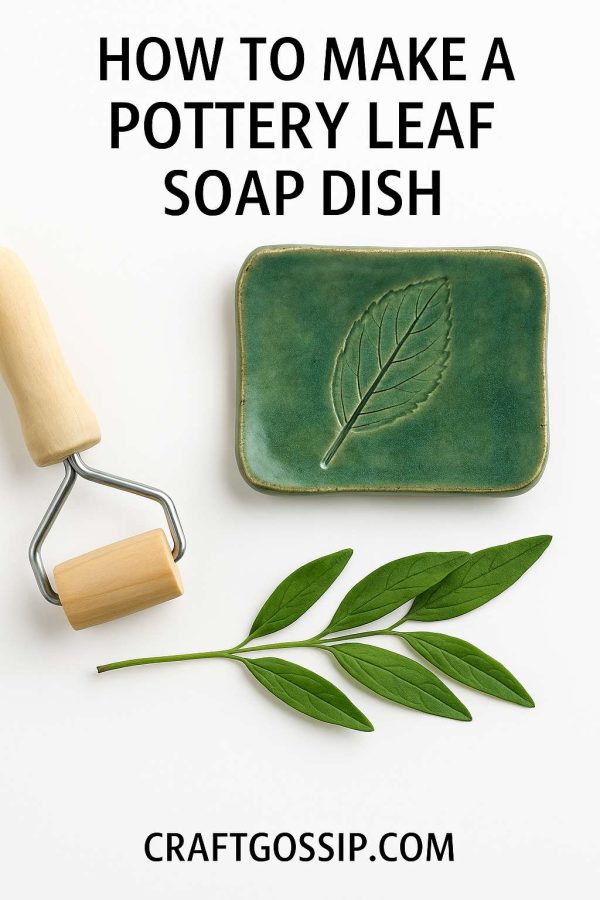
If you’ve ever admired the way nature leaves its mark on clay, this project is going to steal your heart. Today, we’re making a leaf imprint pottery soap dish that’s not only functional but also brings a touch of the garden into your home. With its glossy green glaze, this little tray feels like it was plucked straight from nature itself—fresh, earthy, and timeless.
A soap dish is one of those projects that’s perfect for beginners and seasoned potters alike. It’s small, manageable, and endlessly customizable. Whether you use it in the bathroom, kitchen, or gift it to a friend, this handmade dish will be admired every single day.
Why Leaf Imprints Work So Beautifully in Clay
Leaves have a natural design that’s practically made for pottery. Their veins and outlines press into clay with surprising detail, creating delicate textures that remain visible even after glazing.
For this project, you can use almost any leaf from your garden, but avoid ones that are too thick or fleshy (succulent leaves, for example, don’t press well). Instead, go for herbs, ferns, or tree leaves—something with strong vein definition.
When glazed in a green finish, the leaf impression pops even more, giving your soap dish that rustic-yet-polished botanical look.
Materials You’ll Need
- Clay slab (pottery clay for kiln firing, or air-dry clay if you want a decorative-only version)
- Fresh leaf with strong veins (washed and patted dry)
- Rolling pin or clay roller
- Canvas or burlap surface (to roll clay on without sticking)
- Knife or clay cutter
- Sponge and bowl of water (for smoothing)
- Wooden dowel or tool for drainage holes
- Small clay balls (for footers)
- Underglaze wash (optional, for highlighting the veins)
- Green glaze (for pottery version)
- Clear sealant (for air-dry clay)
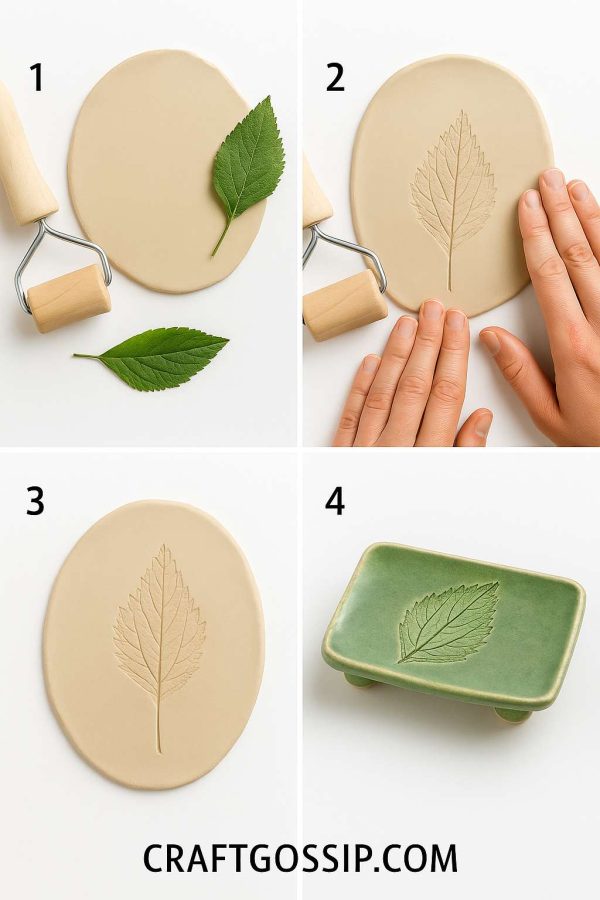
Step-by-Step Tutorial
Step 1: Roll Out Your Clay
Start with a lump of clay about the size of your fist. Place it on a canvas-covered surface and roll it out into a slab about 1 cm thick. Cut into a rectangle or oval—soap dish shapes work best when they’re simple and practical.
Step 2: Press the Leaf
Lay your chosen leaf face down on the clay slab. Using the rolling pin, gently but firmly press it into the clay, making sure every vein makes contact. Peel it away carefully to reveal the imprint. This is the moment the magic happens—you’ll see every little detail captured.
Step 3: Add Drainage Holes
To keep soap dry, poke 2–3 holes in the center of your slab using a dowel, straw, or any small round tool. These will let excess water escape.
Step 4: Shape the Dish
Lift the slab and place it over a small curved mold or the back of a shallow bowl to give it a gentle dish-like curve. Smooth the edges with a damp sponge.
Step 5: Attach the Footers
Roll three or four small clay balls and attach them to the base of your dish using score-and-slip. These footers give your soap dish stability and a more professional finish.
Step 6: Dry and Fire
For kiln pottery clay:
- Let the dish dry completely to bone dry.
- Bisque fire in the kiln.
- Brush a thin dark underglaze or oxide wash into the leaf veins and wipe away excess—this step enhances the detail.
- Apply a coat of green glaze over the entire dish.
- Glaze fire for a glossy, waterproof finish.
For air-dry clay (decorative only):
- Let the dish dry for 24–48 hours, flipping occasionally.
- Paint the leaf imprint with green acrylic paint or a watercolor wash effect.
- Seal with a clear varnish for durability.
Variation Ideas
- Different Leaves: Try ferns for a delicate design, or maple leaves for bold autumn vibes.
- Multiple Colors: Instead of all-over green, use a wash of black in the veins before glazing green on top. This gives incredible depth.
- Rustic Finish: Roll your clay slab on burlap first to add subtle texture behind the leaf imprint.
This DIY Leaf Imprint Soap Dish is proof that the simplest natural elements can make the most striking designs. The glossy green glaze highlights the leaf’s details beautifully, making the finished piece look both handmade and timeless.
Whether you keep it by your sink, tuck it into a gift basket with handmade soap, or create a set to sell at markets, this little project has endless charm. It’s the kind of craft that reminds us how much beauty is right outside our door—in every leaf, waiting to be pressed into clay.
Cool hair clips! (& who doesn’t love octopi?)