When you spend hours shaping, smoothing, and perfecting your clay piece, it deserves one final touch — your mark. Signing your clay work is more than just “claiming it.” It’s about adding authenticity, preserving your creative legacy, and making each piece undeniably yours. Whether you’re a polymer clay jewelry maker, a ceramic potter, or just starting out with air-dry clay, there are countless ways to personalize and sign your creations.
Let’s dive into why and how to sign your clay work, with tips for every type of clay artist.
Why Should You Sign Your Clay Work?
- Authenticity & Ownership: Your signature is proof that the piece came from your hands, not a mass factory line.
- Legacy & Collectability: Future collectors, family members, or even buyers at craft fairs will appreciate knowing the maker’s name.
- Professionalism: Signed pieces look polished and “finished,” which can elevate your work in the eyes of customers.
- Marketing Value: A consistent maker’s mark makes it easier for people to find and follow your work.
Think of it like a painter signing a canvas — a small but vital part of the creative process.
Methods for Signing Clay Work
1. Hand-Carved Signatures
- Use a needle tool, toothpick, or stylus to etch your initials into wet clay.
- Best for pottery and ceramic clay, where the mark will survive firing.
- Tip: Keep it subtle but legible; large scrawls can disrupt the piece’s design.
2. Clay Stamps & Chop Marks
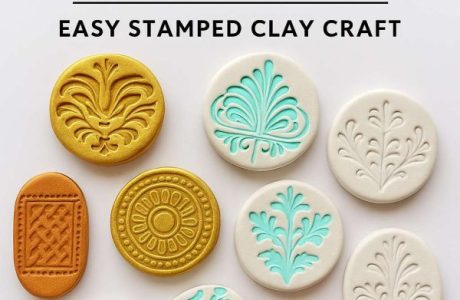
- A custom stamp (wood, rubber, or even carved clay) gives you a consistent maker’s mark.
- Potter’s chops (small, carved symbols or initials) are a tradition going back centuries.
- Perfect for polymer, air-dry, and ceramic artists alike.
3. Underglaze Pencils & Ceramic Pens
- For ceramic work, underglaze pencils allow you to sign with precision before glazing and firing.
- Once fired, your signature is locked into the piece permanently.
4. Engraving After Baking/Firing
- Polymer clay can be signed after baking using a fine engraving tool or Dremel.
- Great if you forgot to sign while raw, but keep it neat.
5. Adding Signature Tiles or Tags
- Roll out small clay tiles or discs, stamp or write your signature, and attach them to the back/bottom of your piece.
- This method works beautifully for jewelry, ornaments, and sculptures.
6. Metallic Inks & Paint Pens
- For polymer and air-dry clay, metallic Sharpies or paint markers can be used post-curing.
- Make sure to seal it with a varnish or glaze to prevent rubbing off.
Signing Tips for Different Types of Clay
Polymer Clay
- Use fine-point tools to etch initials before baking.
- Consider embedding a clay “signature cane” slice for a professional look.
- Seal any ink signatures with a clear coat.
Air-Dry Clay
- Always sign before the clay fully dries to avoid cracking.
- Use stamps or hand-etched marks; avoid inks that may bleed.
- A clear varnish helps preserve pen or paint signatures.
Pottery & Ceramic Clay
- Sign when leather-hard for clean etching.
- Use a potter’s chop for branding consistency.
- Underglaze pencils are best if you prefer a hand-drawn look.
Stoneware & Earthenware
- Keep marks bold — rougher clay bodies can swallow delicate lines.
- Stamp impressions are ideal since they remain visible after glazing.
Creative Ideas for Personalizing Your Signature
- Symbols & Icons: A heart, star, or leaf alongside your initials can become your trademark.
- Dates or Year Stamps: Helps track your progress and adds collectability.
- Logos or Monograms: Commission a custom stamp for brand consistency.
- Hidden Marks: Tuck a tiny signature in an inconspicuous spot for a fun, secret detail.
Common Mistakes to Avoid
- Over-signing: Huge signatures can distract from the design.
- Using Non-Permanent Mediums: Regular pen ink can wash away or smudge.
- Forgetting to Seal: If your medium requires it, seal to protect longevity.
Signing your clay work isn’t about ego — it’s about identity. Each piece you create carries your time, creativity, and love. Whether you’re pressing a stamp into a ceramic mug, etching initials into a polymer pendant, or scratching your name into an air-dry clay trinket, you’re leaving behind a piece of your story.
So next time you finish a project, pause before you call it done. Add your mark. Future you — and your future collectors — will be so glad you did.