Nothing says Christmas quite like a tree full of ornaments that tell a story. And while shiny store-bought baubles have their place, there’s something truly special about handmade clay Christmas ornaments. This version takes a classic air-dry clay project and elevates it with embossed textures—using simple texture plates, doilies, lace, or even rubber stamps to press patterns into the clay before painting.
The result? Chic, round bauble-style ornaments that look like they belong in a high-end boutique but cost just pennies to make.
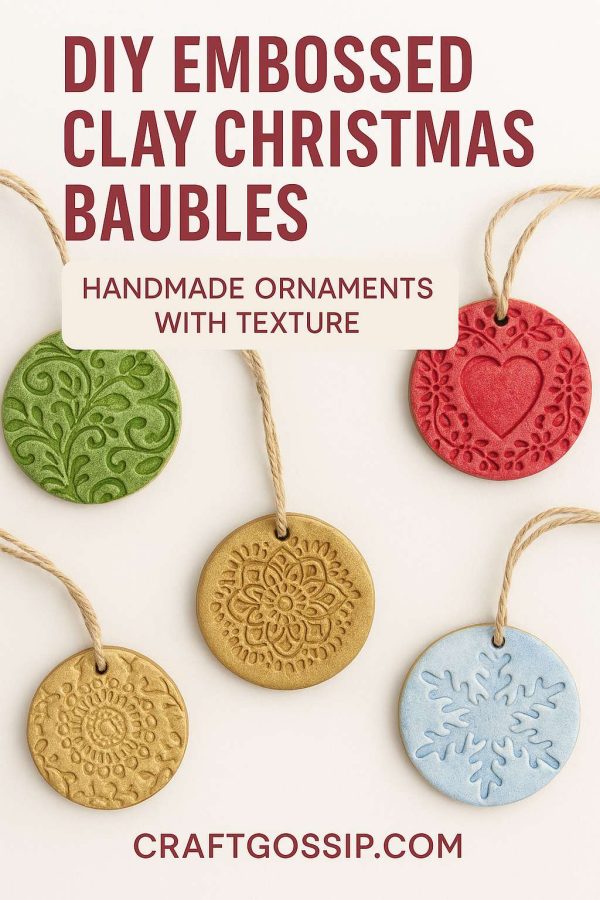
Why You’ll Love These Embossed Clay Ornaments
- Elegant texture – embossing gives a 3D effect that looks polished and professional.
- Endless design possibilities – experiment with lace, stencils, or textured plates.
- Customizable colors – paint them to match your Christmas theme (traditional red and green, modern gold and silver, or soft watercolors).
- Keepsake-worthy – add initials, names, or even the year to create family treasures.
Materials You’ll Need
- White air-dry clay (smooth, fine texture works best)
- Rolling pin
- Round cookie cutter (or trace a cup for perfect bauble shapes)
- Texture plates, lace, stencils, or rubber stamps
- Straw or skewer (to make hanging holes)
- Metallic or watercolor paints
- Small paintbrushes and sponge brushes
- Ribbon, twine, or baker’s string
- Wax paper or silicone mat for rolling surface
- Optional: Matte sealant spray for protection
Step-by-Step Instructions
Step 1: Roll Out the Clay
Roll your air-dry clay to about ¼ inch thick. Smooth and even thickness is key so they don’t crack.
Step 2: Cut Out Round Shapes
Use a round cookie cutter (or even the rim of a glass) to cut out classic bauble shapes. Keep them uniform for a professional look.
Step 3: Emboss the Texture
Here’s where the magic happens. Gently press your chosen texture plate, lace, or stamp into the surface of the clay. Don’t press too hard—just enough to leave an even, raised pattern.
Step 4: Punch the Hanging Hole
Use a straw or skewer to create a clean hole at the top of each bauble. Make sure it’s wide enough to fit your ribbon or twine.
Step 5: Smooth & Dry
Smooth edges with a damp finger. Lay the baubles flat and let them air dry for 24–48 hours, flipping occasionally to prevent curling.
Step 6: Paint & Decorate
Once dry, paint them to highlight the texture. Try:
- Metallic gold/silver brushed over embossed areas.
- Watercolor washes for a softer, marbled look.
- Classic red, green, and white for traditional Christmas décor.
Step 7: Add Ribbon & Hang
Thread ribbon or twine through the hole, tie, and hang them proudly on your tree.
Extra Tips & Variations
- Use alphabet stamps to emboss family initials or the year.
- Dry brush metallic paint over just the raised parts for a stunning antique effect.
- Try black clay with silver paint for a dramatic modern look.
- Add glitter paint for festive sparkle.
Handmade ornaments have a way of turning into family heirlooms, and these DIY embossed clay baubles are no exception. Whether you make them as a solo crafting project or as a festive family activity, you’ll end up with beautiful, unique decorations that will be cherished for years to come.


