• Home
  • Suggest A DIY
  • DIY Newsletter

Polymer Clay

Fimo and clay tips and tutorials

  • About CraftGossip
  • Our Network
    • Bath & Body Crafts
    • Candle Making Ideas
    • Crochet Ideas
    • Cross Stitch
    • Edible Crafts
    • Felting Patterns
    • Glass Art
    • Home & Garden Ideas
    • Indie Crafts
    • Jewelry Making
    • Kids Crafts
    • Knitting Patterns
    • Lesson Plans
    • Needlework
    • Party Ideas
    • Polymer Clay
    • Quilting Ideas
    • Recycled Crafts
    • Scrapbooking
    • Sewing Patterns
    • Card Making
    • DIY Weddings
    • Not Craft Ideas
  • Giveaways
  • Roundups
  • Store
  • Search

Colour Recipes and Polymer Clay

June 13, 2017 by Elaine Robitaille

I am pretty sure one of the best attributes of regular old oven bake clay is that it is both a modeling medium to make objects from and a medium with pigment to do decoration with. This can add a layer of complexity to polymer clay pieces as you have to learn both aspects but it also makes for a more interesting medium to work with.

The colour aspect means that there are many polymer clay artists who’ve spent a lot of time making recipes and mixing colours to see what can be done. Painters do this, making swatches, when they paint and it’s no surprise clayers do the same. Syndee Holt, blogging for Sculpey.com, has an ongoing column about this. This week’s column is about some of the colour mixes you can get with Premo! Bronze.

I mostly use Premo! Bronze for wood coloured pieces. The mica shift in the clay gives it a subtle marbling right off and I’ll occasionally mix in a bit of brown and gold shades to add other hues.
«
»

Have you read?

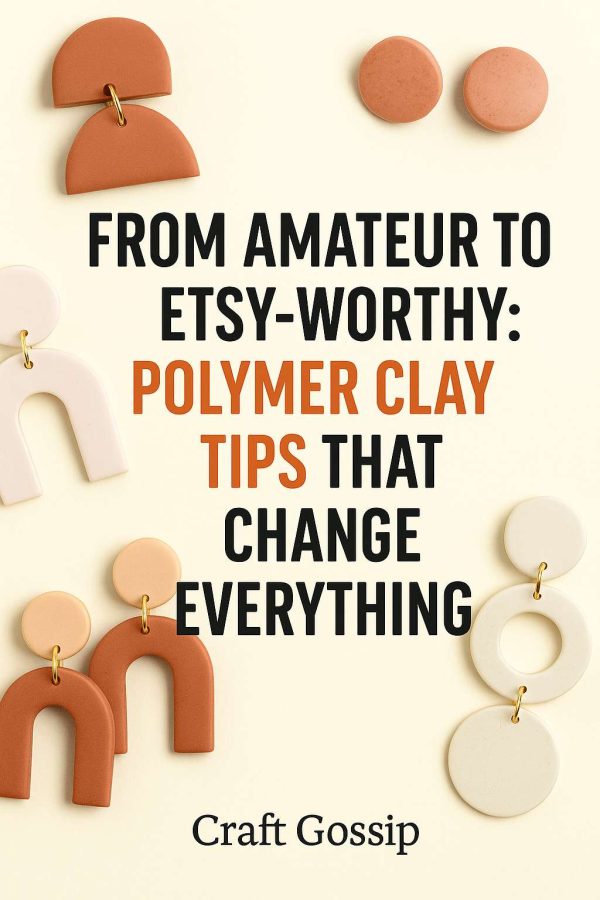
From Amateur to Etsy-Worthy: Polymer Clay Tips That Change Everything

Polymer clay jewelry is everywhere — those lightweight statement earrings, modern studs, and bold dangles that pop up on Pinterest and Etsy like confetti. But if you’ve ever sat at your kitchen table with a block of clay, only to end up with cracked, uneven, or slightly sad-looking earrings… you’re not alone.

I’ve been there. My early earrings looked like something my kids might have made in preschool art class (love them, but not exactly “Etsy chic”). The good news? With the right tricks, you can go from clumsy beginner to professional-level crafter in no time. Here’s how to take your polymer clay projects from amateur to Etsy-worthy.

1. Start with the Right Clay

The number one game-changer? The clay itself. Bargain packs from the dollar store or craft kits often bake brittle and weak.

Best Picks:

  • Premo Sculpey – strong, flexible, perfect for earrings 
  • Soufflé by Sculpey – slightly softer, great for beginners 
  • Fimo Professional – excellent for crisp detail 

Pro tip: Buy a few sample colors and test before stocking up. The difference in quality is night and day.

2. Condition Like a Pro

Conditioning clay is more than just warming it up. It blends the particles and prevents cracks during baking. If your clay snaps or crumbles, it probably wasn’t conditioned enough.

Quick Hack: Run your clay through a pasta machine (dedicated to crafts, not spaghetti!) 10–15 times until it’s smooth and even. Your wrists will thank you.

3. Nail the Perfect Thickness

Too thick, and your earrings look chunky. Too thin, and they break. The sweet spot? About 2–3mm.

Use acrylic guide sticks, playing cards, or wooden dowels to keep your slab even. Professional makers swear by this little step, and it truly changes the finish.

4. Invest in Quality Cutters

Blunt cookie cutters or makeshift tools leave ragged edges that scream “homemade.” Sharp polymer cutters give crisp, repeatable shapes.

Upgrade your toolkit: Look for stainless steel cutters or 3D-printed sets designed for clay artists. And remember to clean between cuts — nothing worse than black crumbs in a pastel slab.

5. Master the Bake

This is where most beginners stumble. Uneven ovens mean cracked, scorched, or bendy earrings.

Fix It:

  • Use an oven thermometer (your dial lies, trust me). 
  • Tent your clay with foil to prevent browning. 
  • Always bake at the manufacturer’s temp — no guessing. 

6. Sand, Buff, and Shine

This step is the difference between “cute craft project” and “professional boutique jewelry.” Raw edges look unfinished.

After baking:

  • Sand with fine-grit paper or micro-mesh pads. 
  • Buff on denim or a polishing cloth. 
  • Add resin or varnish if you want a glossy look, or leave matte for a modern finish. 

7. Attach Findings the Right Way

A common beginner mistake? Supergluing posts to the back. They’ll eventually pop off.

Pro Technique: Embed posts in raw clay with a dab of liquid polymer clay, then bake. For dangles, drill neat holes and use sturdy jump rings. This tiny detail makes earrings last.

8. Keep Your Workspace Clean

Polymer clay is a lint magnet. Tiny specks, pet hair, and dust sneak in and ruin pastel slabs.

Quick Fixes:

  • Work on a ceramic tile or glass cutting board. 
  • Wipe tools between colors. 
  • Roll a lint roller over your clay before cutting. 

9. Finish with Confidence

Want your earrings to look Etsy-worthy? Present them like they belong there. Pretty earring cards, polished photos, and clean packaging make all the difference.

Progress, Not Perfection

Every polymer clay maker has a “what was I thinking?” box of early earrings. Don’t be discouraged. Each batch gets better. The real secret? Keep practicing, keep sanding, keep learning.

Before you know it, your friends will be asking if you bought those earrings — and you’ll get to grin and say, “Nope, I made them.” That’s when you know you’ve gone from amateur to Etsy-worthy.

Categories

air dry clay animals Artist Spotlight Christmas Clay Canes Clay Charms Craft Inspirations DIY Clay Tutorials and Patterns earrings Freebies halloween Inspiration necklace Plates, Bowls & Platters Polymer Clay Polymer Clay - Techniques Polymer Clay - Tutorials Polymer Clay Community Tips/Tools valentine's day

RSS feed: More Articles More Articles

  • Free Christmas Berry Branch Table Runner Embroidery Pattern Review
  • Freebie Friday – Gothic Christmas Borders and Tags Printable Set
  • Free Felting Tutorial Friday: Nuno Felt Pillow
  • Free Christmas Tree Bauble Knitting Pattern: An Easy Ornament Knitted Flat
  • 8 No-Cook Keto Lunches for Days When the Stove Can Wait
  • Scandinavian Christmas Winter Lantern Review – A Beautiful Dollar Tree Craft with Cozy Nordic Charm
  • 15 Christmas Gifts You Can Sew in an Afternoon
  • Giant Coloring Pages for Kids and Adults: Free Printables, Posters and Classroom Ideas
  • Cozy Crochet Bauble – A Scrap-Busting Holiday Ornament
  • DIY Gift Tags Using Scrapbooking Supplies You Already Have

Pick Your Blog

  • Sewing
  • Knitting
  • Quilting
  • Crochet
  • Home & Garden
  • Recycled Crafts
  • Scrapbooking
  • Card Making
  • Polymer Clay
  • Cross-Stitch
  • Edible Crafts
  • Felting
  • Glass Art
  • Indie Crafts
  • Kids Crafts
  • Jewelry Making
  • Lesson Plans
  • Needlework
  • Bath & Body
  • Party Ideas
  • Candle Making
  • DIY Weddings
  • Not Craft
  • Free Craft Projects

Copyright © 2026 · CraftGossip | Start Here | Contact Us | Link to Us | Your Editors | Privacy and affiliate policy