
I mostly work with oven-bake polymer clays but I do play with them all, on occasion. Of the air drying clay ones I like the effect of cold porcelains best. They have a nice delicate translucence when they’re left white.
Because the ingredients are water-soluble I highly recommend you use a water-based varnish on projects just as Jo the tutorial maker does. Her site has what I consider the basic cold porcelain clay recipe and there’s a rose-making project as well.
Of the homemade clays, I like this sort of one the best. The results look good and the material dries to a nice finish. It is definitely not the easiest one to use – it sticks to everything I find – but has fewer cracks as it finishes.
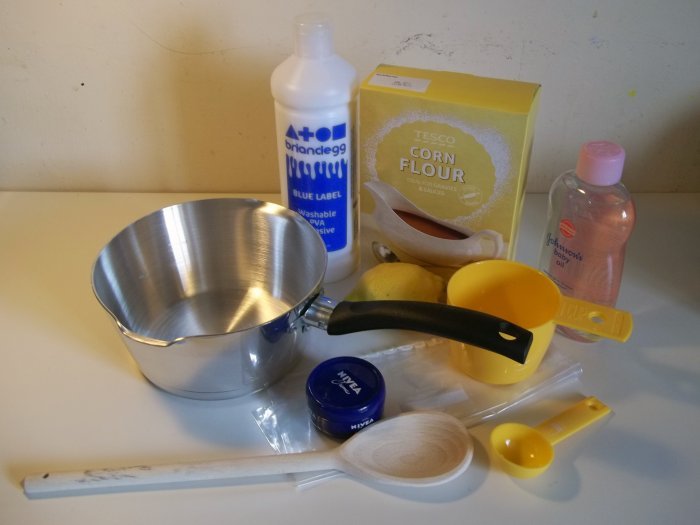
1 cup Cornflour (cornstarch)
1 cup PVA glue
2 tablespoons Baby oil
2 tablespoons lemon juice or vinegar
(my lemon wasn’t very juicy so I needed to use 2)
Non-greasy moisturizer
Plastic food bag (to store clay)
Pinch bowls and pottery bowls are very popular right now so make sure to have a go at making your very own small pinch bowls.
also:
Saucepan or microwavable mixing bowl
(although none of the ingredients are toxic,
it is recommended that you use a dedicated saucepan/bowl
for crafting so as not to risk any cross-contamination)
Spoon (to use just for making clay)
Cooker hob or microwave
What to do
1. Decide how you are going to heat your clay, either on a cooker hob or in a microwave. If you are using a cooker hob you will need a saucepan, if you are using a microwave then you will need a microwavable bowl.
2. Place the measured cornflour (cornstarch) and PVA glue in the pan/bowl and mix together.

3. Stir in the baby oil and lemon juice.
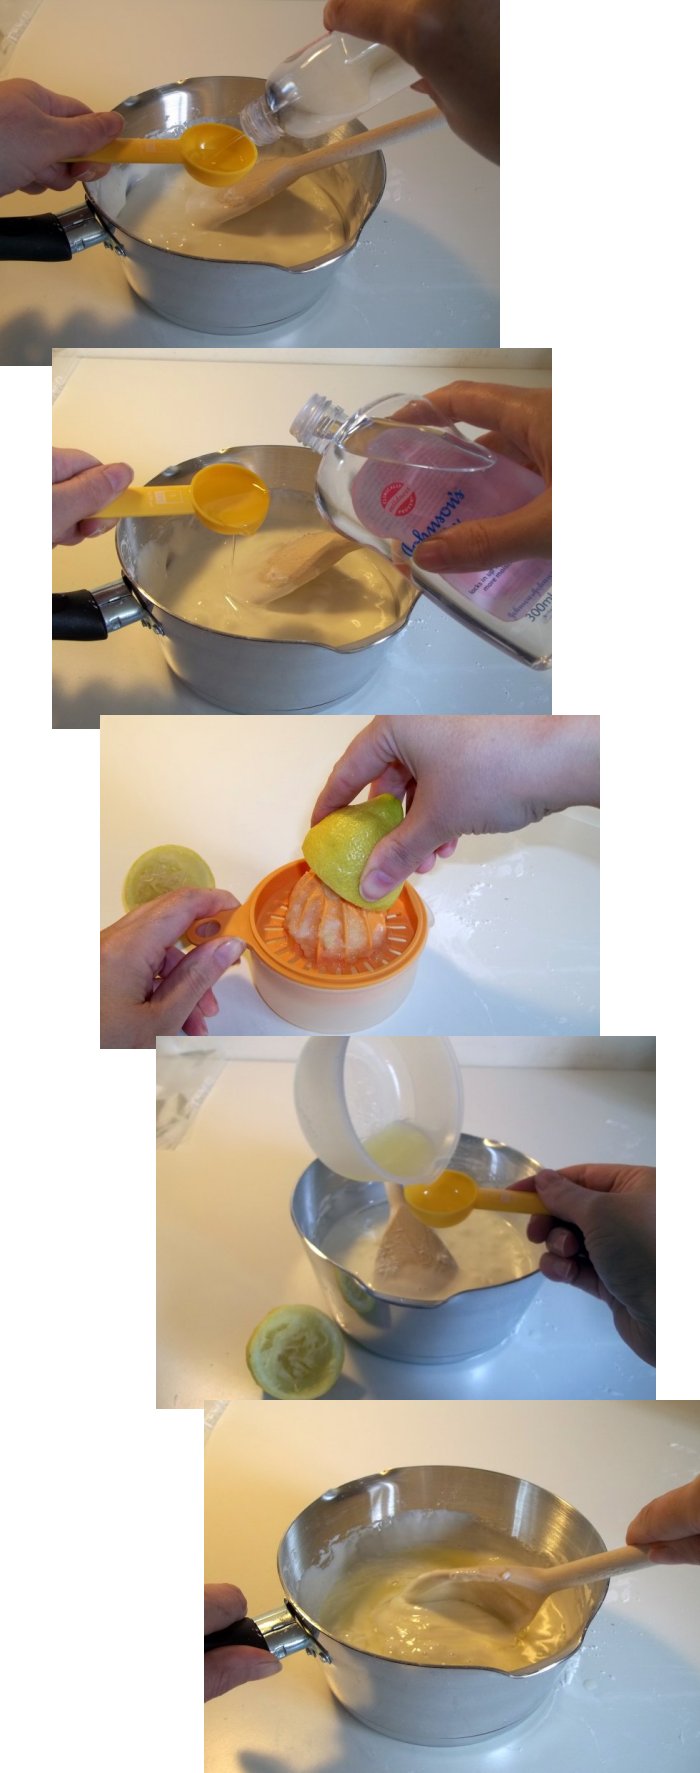
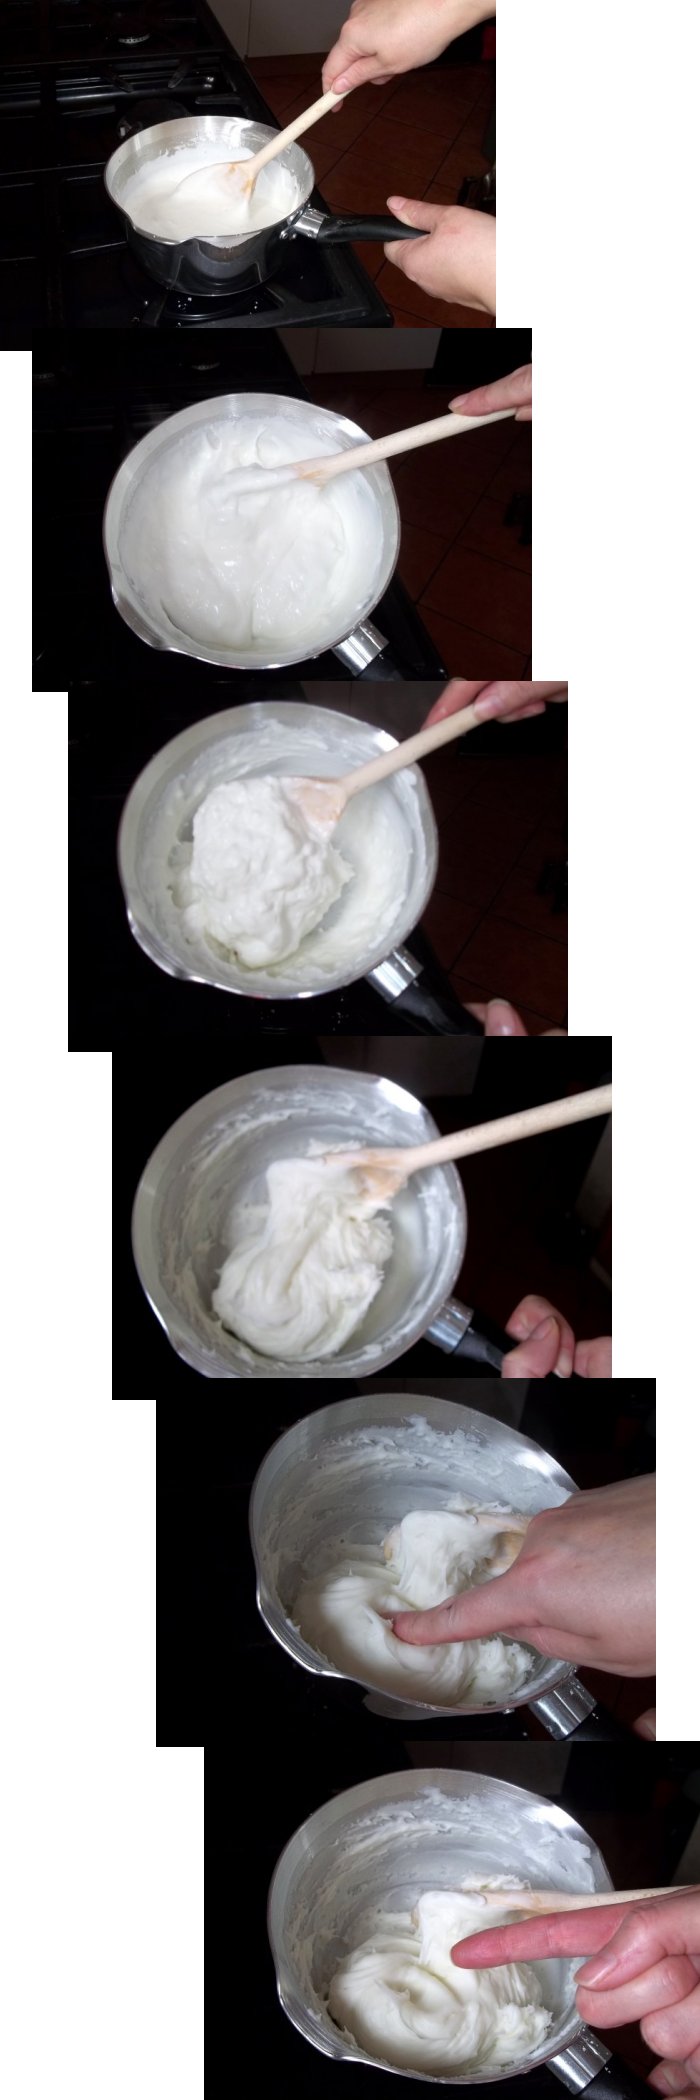
4. Gently heat until it forms a solid ball – It will gradually go lumpy, then clump together to form a ball. The clay will get quite tough to stir as it thickens.
**If heating on the cooker hob then continuously stir over a gentle heat until it has formed a solid ball with no liquid left**
Mine took about 8 minutes.
**If heating with a microwave, cook for 30 seconds then stir thoroughly, continue to alternate heating for 30 seconds and stirring until it has formed a solid ball with no liquid left**
5. Spread a small amount of moisturizer on your work surface, tip the clay out and knead until cold (it will be hot to start with so be very careful) – fill your pan/bowl with hot water to soak.
**TOP TIP – I found that even though I had used the moisturizer the clay still stuck to my work surface so I rubbed a little moisturiser on the palms of my hands and pressed & kneaded the clay just between the palms of my hands (it didn’t stick). I kneaded it in this way for about 20 minutes until it had gone cold – TOP TIP**
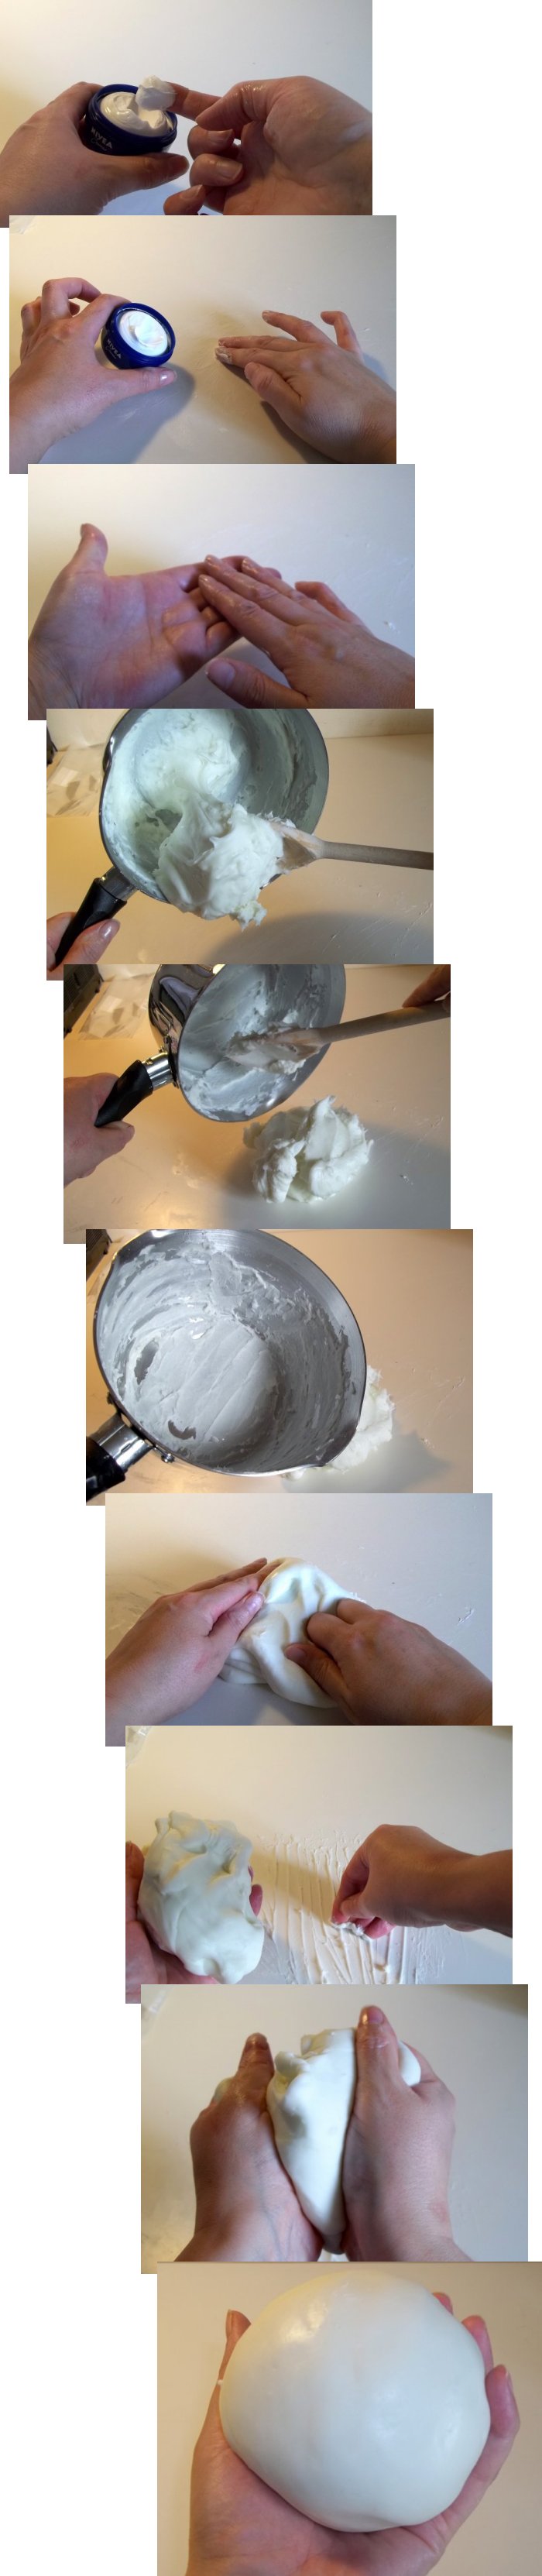
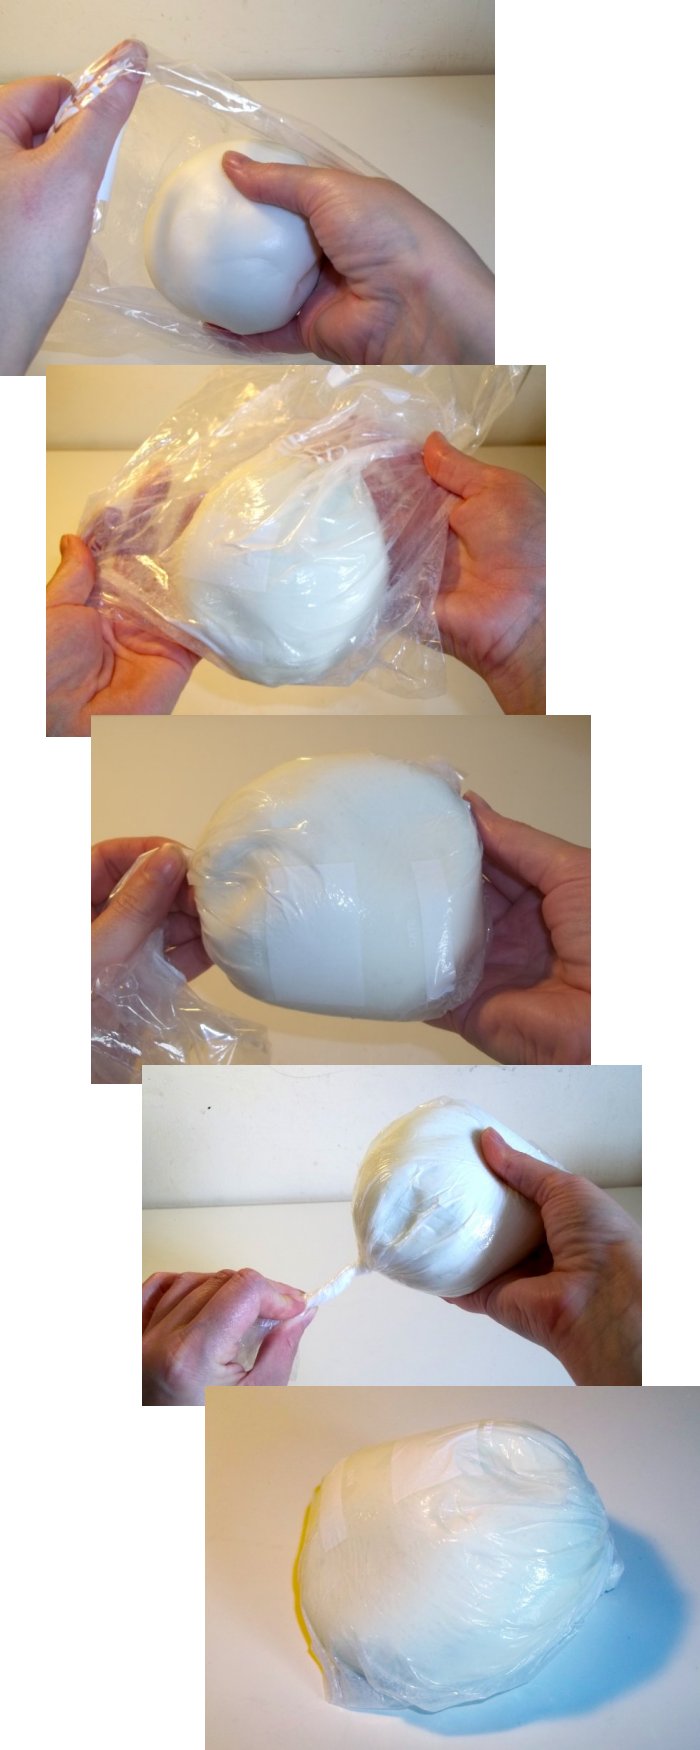
6. Put a little moisturiser in the plastic bag and rub it around so the sides are covered.
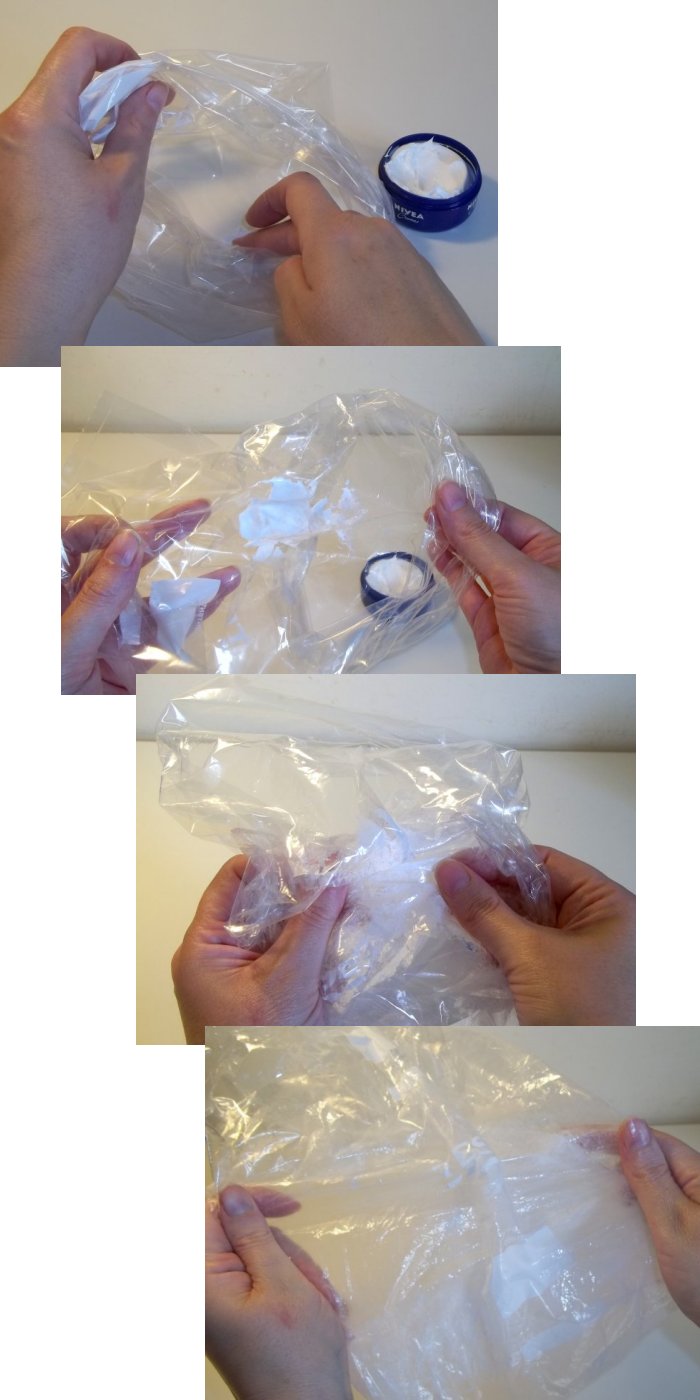
7. Place the ball of porcelain clay in the bag, squeeze out all the air from the bag, twist to seal and leave for 24 hours before using.
8. Your clay can now be used for any number of sculpting craft projects.
(source)

Can you bake this clay?
This is such a good idea. But how do I cure the clay once I have made something?
How do you finish your project? Do you bake it let it sit and dry?
Also, do you paint it afterwards?
Great job on making the clay. I have made this type of clay before but I had a horrible time cleaning the pot. Did you figure out any kind of cleaning tip you can share?