• Home
  • Suggest A Craft
  • DIY Newsletter

Polymer Clay

Fimo and clay tips and tutorials

  • About CraftGossip
  • Our Network
    • Bath & Body Crafts
    • Candle Making Ideas
    • Crochet Ideas
    • Cross Stitch
    • Edible Crafts
    • Felting Patterns
    • Glass Art
    • Home & Garden Ideas
    • Indie Crafts
    • Jewelry Making
    • Kids Crafts
    • Knitting Patterns
    • Lesson Plans
    • Needlework
    • Party Ideas
    • Polymer Clay
    • Quilting Ideas
    • Recycled Crafts
    • Scrapbooking
    • Sewing Patterns
    • Card Making
    • DIY Weddings
    • Not Craft Ideas
  • Giveaways
  • Roundups
  • Store
  • Search

Shopping! For clayers

October 21, 2011 by Elaine Robitaille

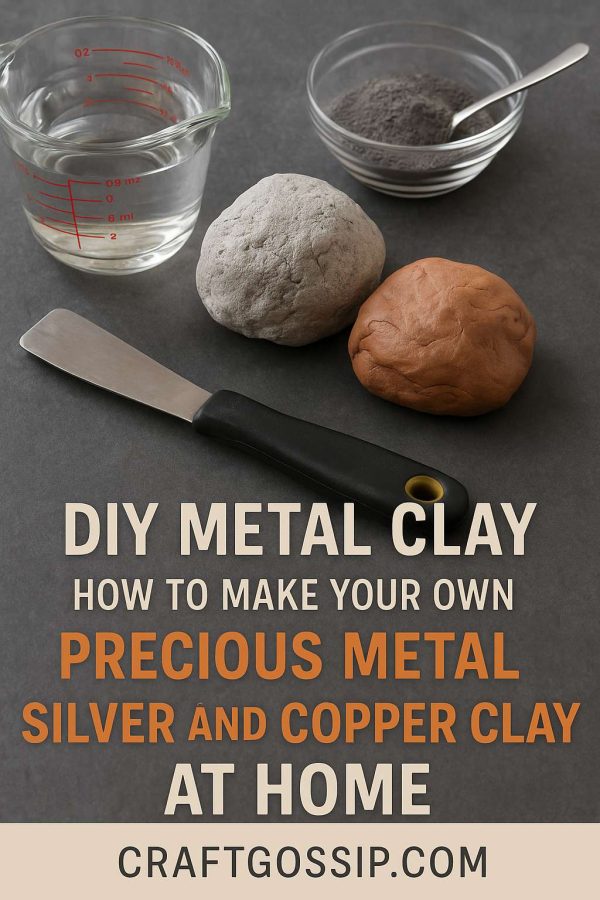
This week I faced my love-hate: I had to shop for clay. I love clay. I hate shopping. Well, sometimes I like it but from online, never as fun and there’s no crafty place within a 150 miles. Seriously, my nearest Michaels is that far away.

Still, I loaded up on goodies. I even broke down and ordered a replacement pasta machine and motor for my Atlas 150 which is nearing The End.

My question to all you polymer clay loving folks… who do you love to shop with? Who’s got the best deals, the selection you like best, the nicest service? What’s cool and new to buy in the clay world (on top of being in the boonies, I’m also in Canada where things don’t get released nearly as often as in the US) that you’re keen to pick up?

I’m interested in making this a regular thing – reviewing products and shops we’ve all used and loved. So… send me your links to all things clay supply, clay book, clay store, clay tools.

«
»

Comments

  1. Susan Averello says

    October 22, 2011 at 12:45 pm

    Polymerclayexpress is my favorite at polymerclayexplress.com. I can get just about everything all polyfrom products, cernit, kato and fim, soft and classic. Premo is 2/bar regulary and all their clay is fresh, so fresh it often needs to leached a little but that is better that hard and crumbly from micheals.

    They are also the few places that sell Zinc yellow and colbalt.

  2. Jenean says

    October 22, 2011 at 2:27 pm

    I shop locally at Munro’s craft store. They do sell online but I love the atmosphere in the store. I’m satisfied with their selection of clay and accessories and the staff is knowledgeable.

  3. Evirr Eshelman says

    October 22, 2011 at 8:22 pm

    It could be worse…you could be stationed on an island where there are NO craft stores at all (that’s me), so pretty much, whoever I can actually get to ship things here online is my only choice. I will be checking out this polymerclayexpress.com and crossing my fingers they will ship here (and it wont cost me my left leg)

  4. Elaine says

    October 23, 2011 at 8:35 pm

    I do shop online at Munro’s – can’t beat the price easily when you’re buying in the quantities I use – and I like polymerclayexpress for small stacks of goodies + using my PayPal.

    Evirr – if you need a good chunk of stuff, try Munrocrafts. Polymerclayexpress is great if you need a moderate amount.

    And you’re right – I do get the chance to go hit a craft store every two months or so when I go to the city.

  5. Yannie says

    December 30, 2011 at 9:42 pm

    I’m new here in Canada and just started the polymer clay craft. I love Michaels, unfortunately it’s too far from where I live. Thanks for posting this. I learned where to get supplies.

  6. Elaine says

    December 31, 2011 at 7:41 pm

    Yeah, when I lived in Calgary I could hit the Michaels (or it’s predecessors) but now in rural Saskatchewan, I have issues. Mostly, I order from Munro’s and Polymerclayexpress

Have you read?

DIY Metal Clay: How to Make Your Own Silver and Copper Clay at Home

If you’ve ever dreamed of turning powder into precious jewelry with your own two hands, metal clay is pure magic. Imagine taking fine silver or copper powder, mixing it with a binder, shaping it like clay, and then—poof!—after firing, you’re left with solid metal jewelry.

While you can buy ready-made packs of silver clay, they’re pricey. The good news? You can make your own at home, and it’s easier than you think. In this guide, I’ll walk you through how to make homemade silver and copper clay, tips for success, firing methods, and a handful of inspiring project ideas.

What Exactly Is Metal Clay?

Metal clay is a mix of fine metal powder (silver, copper, bronze, even gold), an organic binder, and water. It looks and feels like soft pottery clay, but once it’s dried and fired, the binder burns away and you’re left with solid metal.

Think of it as sculpting in clay with a shiny, wearable reward at the end. Unlike traditional silversmithing, there’s no sawing, soldering, or hammering required—just shape, dry, and fire.

Why Bother Making Your Own?

  • Cost savings: Store-bought silver clay can cost $50–$70 for a tiny 15g pack. Homemade clay is far more affordable, especially for bigger projects.

  • Creative control: You decide the texture, flexibility, and firing strength by adjusting your recipe.

  • Sustainability: Making your own lets you experiment with reclaimed metal powders or even recycled filings.

  • Satisfaction: There’s something deeply rewarding about making the medium itself, not just the jewelry.

Materials and Tools

Here’s your basic shopping list for DIY metal clay:

  • Metal powder: Fine silver, copper, or bronze powder. Look for mesh size 325 or finer for best results.

  • Binder: Options include CMC powder (carboxymethyl cellulose), methylcellulose, or gum tragacanth. These help the clay stick together until firing.

  • Distilled water: Keeps impurities out of your mix.

  • Optional additives:

    • Glycerin for longer working time.

    • Tools: Ceramic or glass mixing bowl, silicone spatula, airtight containers, plastic wrap, and a small kitchen scale.

Safety gear: Wear a mask when working with fine powders and gloves if you have sensitive skin.

Step-by-Step: How to Make DIY Metal Clay

Step 1: Weigh Your Ingredients

A good starting ratio is 90% metal powder and 10% binder by weight. If your clay feels crumbly later, you can adjust by adding more binder.

Step 2: Mix the Dry Ingredients

Combine your powder and binder thoroughly. Sift if needed to break up clumps.

Step 3: Add Water Gradually

Using a dropper or spoon, drizzle in distilled water while stirring. The mixture should come together into a soft dough.

Step 4: Knead and Test

On a non-stick surface, knead the mixture like bread dough until smooth. Press a small ball flat—if it cracks, add more water. If it sticks, dust with a touch more binder.

Step 5: Store Properly

Wrap the clay in cling film and place in an airtight container. Refrigerate if storing for more than a day. Homemade clay dries out faster than store-bought.

Working with DIY Metal Clay

  • Keep it damp: A spritz bottle of distilled water is your best friend.

  • Use release agents: Olive oil, balm, or cornstarch stops clay from sticking to stamps, molds, and tools.

  • Texture play: Press lace, leaves, or rubber stamps into your clay for beautiful natural patterns.

  • Dry thoroughly before firing: Air-dry 24 hours or place on a warming plate until bone-dry.

Firing Homemade Metal Clay

This is where the magic happens—your clay becomes solid metal.

Firing Silver Clay

  • Torch firing: Suitable for small pendants, charms, or earrings. Use a butane torch and heat until glowing orange (approx. 650–800°C). Hold for 2–5 minutes.

  • Kiln firing: Best for larger or thicker pieces. Fire at 800–900°C for 30–60 minutes.

Firing Copper or Bronze Clay

  • Needs a kiln and activated carbon (to prevent oxidation).

  • Place dried pieces in a stainless-steel container, bury in activated carbon, and fire at 900–950°C for 2–3 hours.

Tip: Always fire a test strip first to check shrinkage and strength.

Finishing Your Pieces

After firing, your pieces will look matte and a bit dull. That’s normal! To bring out the shine:

  1. Brush with a brass wire brush.

  2. Burnish with a steel tool for a glossy finish.

  3. Tumble-polish in steel shot for a mirror shine.

Optional: Add patinas (like liver of sulfur) to bring out textures and shadows.

Project Ideas for DIY Metal Clay

Here are a few creative starter projects:

  • Name pendants – Stamp children’s or grandchildren’s names into small silver bars.

  • Nature impressions – Press real leaves, flowers, or lace into clay for organic textures.

  • Fingerprint charms – Perfect keepsakes for new parents or grandparents.

  • Beads and buttons – Shape little rounds for custom jewelry or sewing projects.

  • Earring drops – Roll thin sheets and cut with mini cookie cutters.

Troubleshooting Common Problems

  • Cracking while drying: Clay too dry. Add more water and knead again.

  • Warping: Clay dried unevenly. Always dry pieces flat on a non-stick surface.

  • Weak after firing: Not enough binder or under-fired. Increase temperature slightly next time.

  • Excessive shrinkage: Too much binder or too little powder. Stick to the 90/10 ratio.

Safety Tips for DIY Metal Clay

  • Always wear a dust mask when handling powders.

  • Work in a well-ventilated space.

  • Don’t use kitchen tools for food after mixing clay. Keep them separate.

  • Let fired pieces cool completely before handling.

Where to Buy Supplies

  • Online jewelry suppliers (look for “fine silver powder” or “325 mesh copper powder”).

  • Pottery and ceramic shops (for binders and carbon).

  • Craft stores (some carry small packs of CMC powder).

Making your own silver or copper clay at home is part science experiment, part craft therapy. It saves money, gives you full control over your materials, and opens up a whole new world of jewelry making. Once you get the hang of it, you’ll find yourself experimenting with textures, firing techniques, and even combining metals for unique results.

Metal clay is one of those crafts that bridges the gap between ancient tradition and modern DIY. So grab your powders, roll up your sleeves, and let a little alchemy happen right at your kitchen table.

RSS More Articles

  • Free Crochet Pattern – Ingrid
  • How to Watercolor on Black Cardstock for a Floral Card
  • DIY Teddy Bear Pattern: A Cuddly and Customizable Project for All Ages
  • Knit a Blanket with the Texture of a Ceiling
  • 20 FREE Camping Quotes Die Cut and Printable Files
  • Book Review: Super Fun Math Games for Kids
  • IWAS Upcycled Drinking Glasses
  • Free Crochet Strawberry Ribbon Scrunchie Pattern
  • DIY Metal Clay: How to Make Your Own Silver and Copper Clay at Home
  • Book Review: 200 Japanese Cross Stitch Designs

Pick Your Blog

  • Sewing
  • Knitting
  • Quilting
  • Crochet
  • Home & Garden
  • Recycled Crafts
  • Scrapbooking
  • Card Making
  • Polymer Clay
  • Cross-Stitch
  • Edible Crafts
  • Felting
  • Glass Art
  • Indie Crafts
  • Kids Crafts
  • Jewelry Making
  • Lesson Plans
  • Needlework
  • Bath & Body
  • Party Ideas
  • Candle Making
  • DIY Weddings
  • Not Craft
  • Free Craft Projects

Copyright © 2025 · CraftGossip | Start Here | Contact Us | Link to Us | Your Editors | Privacy and affiliate policy