
I read somewhere that no matter how big you make your cane, it’s never big enough!
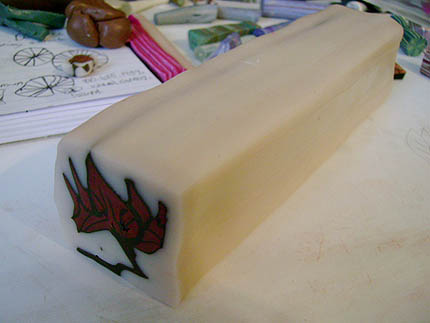
I designed this cane inspired by a William Morris textile last year and finally had to create another one. I took some photos and thought I’d share the process with you. Here is the cane in the beginning, a handful at 3″ wide and 5″ long. I do believe this is the largest cane I’ve created. Usually I work with smaller canes, but as my business has grown so has the size of my canes!
After it’s worked and stretched out a bit, I use my acrylic rod to start shaping it into a square log. I turn it a 1/4 turn after a few passes with the rod until it starts to shrink.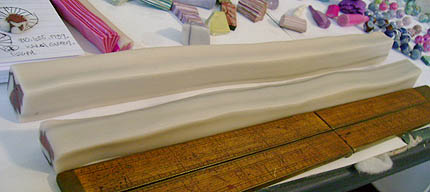
Here you can see it’s 2 feet long! Now it was time to cut it in half and reduce part of the cane to the next size.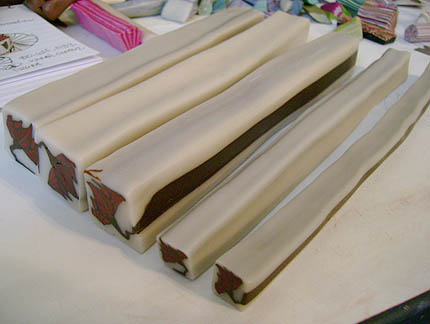
Still using the rod, I have the cane reduced and in two sizes. I cut it up into smaller chunks and wrap them in wax paper. They are then stored until I need them.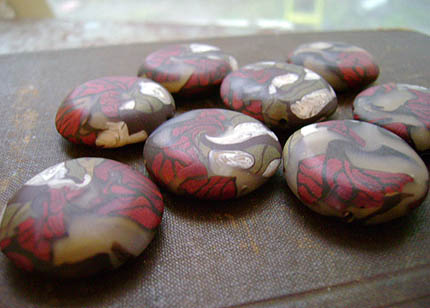
Here is a collection of beads made using the cane.
And in case you are wondering, I sketch out my canes before I make them, breaking them down into what shape is needed for a design. I write any notes that I might need to recreate a design in the future. I also like to keep the last slice of a cane, baked and saved in a little collection for prosperity.
(Please respect copyrights)
Wow, Heather, that’s a lot of clay, you must have very strong arms and hands to manage all that clay. What a great tutorial, thanks for the peek into your cane process.
thanks for sharing the process. I love the colors you used and the finished beads
Taking notes is so important when you create something for the first time, and it is so hard for me to remember to do that!